28/28- a wrap up

How has it already been almost 28 days? I'm so glad I chose this project to organize my life through the month of February! Sometimes it's dreary and having something to do and look forward to was nice!

Here's my original list:
and here's what I got accomplished:
I already updated progress here. And I am happy to announce that I actually managed to do everything on my list this month. Here are some pictures from the second half of the list. I mentioned in the first post that there was no way to take pictures of everything. But I did take some of the bigger items that took me longer than 5 seconds. I would say the most work came from my coupon binder, the book closet, and the blog. I'll explain the blog a little later.

Here are some pictures!


As far as the blog goes (which was #28) here is what I did to clean it up:

1. I took away the popular posts on the right side bar and moved them to a tab at the top of the blog. This freed up space on the side and makes it feel less cluttered.

2. I completely made over the "projects" tab. I hadn't added to that list in nearly a year. So new posts are there along with pictures to help make it look prettier. I am by NO means done, but as I have time I will update!

3. I added a "home tour" page to make all the stuff I talk about flow better. I figured having a before and after of each room was just plain fun, and it helps to see how our home flows together. I have put links of all the major projects we did in each area of our home so you can go directly to those posts. I believe there are 2 after pictures I need- the master bedroom and Luke's room. So those are coming!

4. While I was cleaning things up I marked off a few things on my 101 list. I can't believe that the ending date is next year! I started my original list even before I had a blog while I was on maternity leave with Luke. He'll be 4 this year! Holy cow how time flies!

5. I am trying to get more consistent with blogging and I did pretty stinkin' good this month! My post schedule is typically every Monday and Wednesday with a life update post on Friday. If we have a fun weekend planned I hold off on the update post until Sunday. I will occasionally post more frequently, but it depends on time and projects I'm working on!

6. I went back through old posts and tried to clean them up. When I moved everything over from wordpress the pictures transferred small and the font was tiny. I do plan to reload all the pictures later (because many of them are pixalated), but I just didn't have the time this month.

7. I used a program to check all my links. It seems like I average 2-3 links per post and it's no fun if the links are broken. I went thorough and tried to fix all those. Again, the switch from wordpress messed up alot of things, so I am still fixing those broken links. Alot of them are messed up going to my 101 list. Not really sure why!

I hope those few updates help this blog flow better! After nearly 300 posts it's hard to keep things organized!

Hairbows

Not even going to lie- when I found out we were having a girl I just about squealed thinking of all the sweet hair bows, girly socks, and outfits she would wear. Boys are SO fun to dress because they are super easy- but I can't wait to actually "fix" my daughters hair. Or coordinate her outfits!

I have a ton of ribbon sitting around- mainly from my sewing days. I still sew, but mainly just have time for our things. So I figured I might as well put it to use and knock out some hair bows. I already have some that I made over a year ago- I just never got around to selling them. Now they are the beginning of Emberly's hair bow collection!

As I looked through the ones I had, I realized I had very little pink ones (lots or red/green/black). Around the same time I saw one of those "share it to win it" pictures on Facebook that used chevron ribbon. I melted. After a quick google search I found some chevron ribbon on girlyribbons.com. The website was phenomenal, I had a question about the actual color of one of the ribbons and they responded within hours, and after a little glitch with checkout they emailed me immediately and fixed everything. My ribbon showed up on my doorstep in less than 4 days (including a weekend)... and did I mention it was 89 cents a yard?!

Here are the chevron ones I made:

And because when I sit down to make a hair bow I can't just make 1... or 4. So here's 3 more!

Weekly Update: 2/18-24

Hello third trimester! Hard to believe it can be here already!

This week I have come to realize that Luke is becoming a big boy- which should make me happy. It means he's growing up, doing things he's suppose to do. But it still makes this mama's heart hurt for him to tell me that he's a big boy and doesn't need me to kiss his boo boos. He told my mom when she kept him last weekend that only babies get rocked to sleep, not big boys. :( So whether I like it or not- he's getting bigger and it's something I'll just have to embrace! And be thankful that he is healthy and strong and able to meet these milestones.

Going with the big boy theme we decided to ditch the baby toothpaste and use the next stage up kids toothpaste now that he can spit and not swallow. The bonus is it's actually protecting his teeth now (not just flavored gel)! He's doing great and loves brushing his teeth.

Monday was President's Day and Josh took a half day so we could hang out at the park. It was gorgeous out!


Not much else to report around here. It was a fairly quiet week and I am thankful for that. I know the quiet will soon be over and I am cherishing these moments. I guess third trimester fatigue is taking it's toll. I could nap everyday if I had the time and I'm in bed by 9pm every night (getting between 9-10 hours of sleep).

This week is lining up to be a busy one! I feel like I'm living weekend to weekend but it's the way I like it!

Baby Blanks

Oh how I love thrift stores!

On a recent trip to Goodwill I came across some pretty amazing blanks. It's really rare to find pristine/never worn/stillhavethetags clothes at a thrift store. It's even more rare to find a huge selection in different sizes and colors.

Upon further inspection of these blanks (by Two Feet Ahead), I realized the snap at the neck was busted.on.every.one. Makes sense why they ended up at Goodwill. But what they failed to realize is with 10 minutes and patience, the snaps can easily be fixed. I grabbed 3 blank onesies for $1.77 each. I did ask if they would give a damage discount at the store and they refused. Oh well at least I tried.

Here was the issue:
See how there is no snap on the left side? Instead it popped off and is stuck in the snap on the right.

Using my tool of choice (and my teeth- sorry dad. I could hear his voice saying "teeth are not tools"), I pried off all the remaining snaps.


After learning how to use my snap pliers again (I have to read the directions every time- it's pathetic), I re-attached 4 new snaps.
Voila!
a perfectly working new snap.
Here is Emberly's first monogrammed outfit. Isn't it precious??
I kind of wish I had picked up 3 or 4 more of these. That's how easy this project was! And the material these blanks are made out of is amazing! It's thick, sturdy cotton.

Weekly Update: 2/11-2/17

Oyyy these weeks are flying. As much as I want time to slow down and I want to enjoy every second of this pregnancy- I'd be lying if I said I'm not counting down. 54 days until maternity leave... but who's counting?

This week was a really great week. Luke got a great report from his teachers at school. He also filled out his Valentine's "all by himself". We practiced writing his name 16 times on the little cards and he was proud when he was finished. Please excuse my husbands less than enthusiastic face.
We went to his Valentine's party at school and he took me to his alphabet wall and pointed to every letter of the alphabet and said it back to me. It was amazing- because I had no idea he knew his alphabet! And I was blown away that when I pointed to X he said "xylophone". Really? He was also excited about the loot he got in his box-
We are also working on our "left" and "right" directions. He loves telling me how to get home from school and how to get to church from home and we are encouraging him to use "left" and "right" instead of this way and that way. It really amazes me at how well he does! Heck I feel like I didn't know my left and right until I was like 10. ;) (ok, truth be told- I still put my thumb and pointer finger in the shape of an L just to double check left).

We are having a nightly visitor- I wish I could snap a picture of him. It is literally the largest raccoon I've ever seen (not that I've seen many). He's getting into our dog food outside (who even knows how long this has been going on), but needless to say with Sadie being behind on her shots and raccoon's track record with rabies, we are going to be "doing away with him" shortly. Oh did I mention we have a galvanized steel trashcan that we store our food, the top is bungee corded, and we stacked stuff on top to startle him, and he still got in last night. Crazy.

On Friday night we drove to Asheville, NC for a visit to the Biltmore Estate. Oh we just love that place. Not only did we honeymoon there 5 years ago, but we have a yearly pass until next Christmas... so we should be going a good bit this year. This past weekend we stayed in the beautiful Renaissance Hotel in downtown Asheville. What an amazing place!
There was so much I loved decorating wise- see that "Edison" lamp? and the ruffle pillows... and the bookshelf, fireplace, @ chair. All amazing.
I especially loved this collection of key, keyhole, handle art. The colors in this display were swoon-worthy and pulled in all the colors from the surrounding room.
On into the ballrooms were these amazing "medusa" chandeliers. I loved the light it reflected on the ceiling.
And of course our room did not disappoint. It was on the small side, but super cozy. I loved the horizontal striped wall and that amazing headboard! Talk about inspiration!
We traveled with some great friends, and had a relaxing breakfast at the hotel. We toured the house Saturday (Saturdays are SUPER busy- even on the off season) and enjoyed a nice lunch at the Bistro Cafe. Since we have a yearly pass I can't wait to go back- we're thinking about maybe doing the petting zoo next sometime in the Spring? Josh also wants to check out their biking trails. Now that we've found a great hotel I can see us going more frequently!
(yes I am almost in my third trimester... and I just look like a giant marshmallow)
and for old time's sake-
here we were on our first official date in 2005:
and on our honeymoon in 2007:
We were so cold there aren't even words to describe it... actually there are- Josh broke out in hives.

My how the time flies!!

Organizing our chargers/cords

Am I the only one or do chargers seem to reproduce at an astounding rate?? I get so tired of coming across chargers I don't need and never being able to find the ones I do need.

Solution? A charger box. I could have done this a few different ways.

A divided box labeled for each charger:
{no source}
I like all those ideas- but I didn't want to sink a ton of money into this solution. I like the jar idea, but it doesn't seem practical (plus who wants to look at all that?), and I can't devote the back of an entire door to chargers. 

So onto my plan! I have recently been introduced to Washi tape. Maybe I'm behind the times?? This stuff is amazing.

I bought the bins I decided to use at Target in the dollar bin last year. I loved the happy design, and for $1 I knew I could find a use for them. Over the past month or so I have slowly been collecting all my chargers/cords in one of the bins. If I decided one afternoon to do this I know I would miss one or two. This way I knew I had them all there. 

Using my label maker to print the labels and Washi tape to stick to the chargers I instantly had labeled chargers. The only thing that would have made this better would have been clear label maker tape- but I really didn't want to buy anything else since we already had some white tape on hand.
As long as the cords get wrapped up they should stay nice and neat. This way I can tell at a glance which charger goes with which device. Although things like my camera charger are pretty obvious- it still looks pretty and uniform to have everything look the same!
The bin sits on our "office" so it's within reach all the time. I just LOVE this project. And it was super fast to accomplish!

Nursery Progress...

Our old office is slowly being transformed into a nursery. I say slowly because it really is a lot of work to get a room together! I took me until Luke was 2.5 to finish his room- so I'd like to get this one together a little more quickly!

On move-in day this is what this room looked like:
This room turned into an office and we painted the walls Oyster Shell. It was a Lowe's color.

Last year (Valentine's day) we put our house on the market (more about why we did that and why it never sold here) and our agent told us to minimize everything hanging on the walls. We took alot of things off the wall in the office and alot of holes were left behind. I got around to Spackling them, but I never painted over them. Whoops.
Before we even knew we were pregnant, we started rearranging things and we even bought a futon. Our original plan (before the best surprise ever) was to make more space in the office so it could double function as a guest room and office. We ordered the futon 2 days before I got a positive pregnancy test. Surprise! We ended up getting the black (which obviously isn't pictured).

Our plan changed ALOT with the news.

The green curtains (that came with the house) are gone. We used them simply because they "worked", but never really loved them. Green isn't my color anyways. More on the curtains in a little bit.

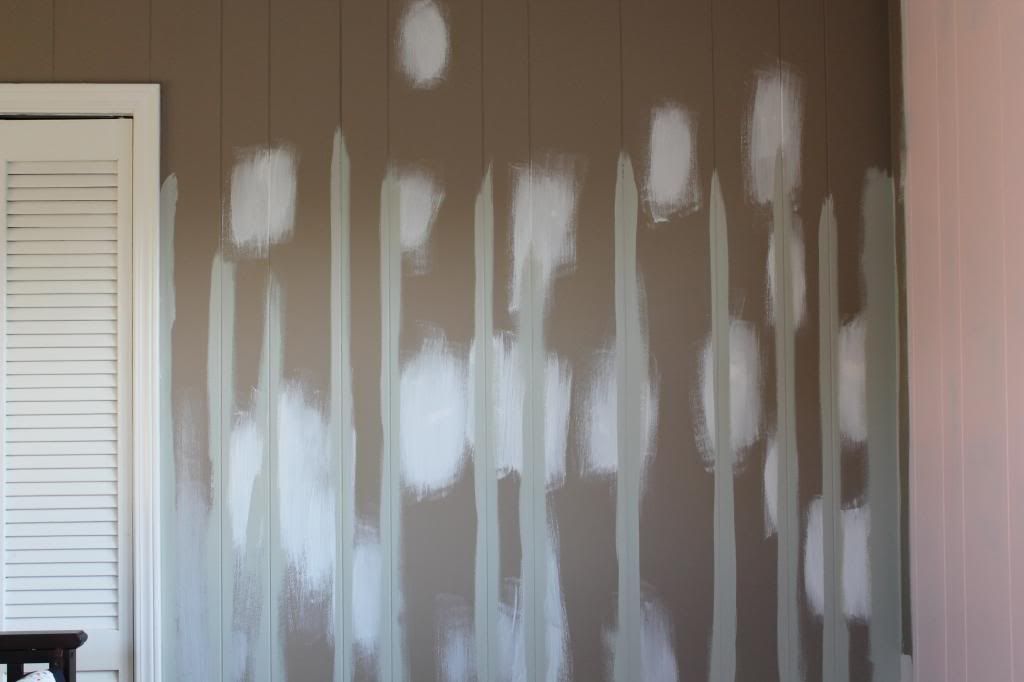
On to the wall! They have paint on them...
On our surprise snow/sleet day I got in there and sanded/primed all the sheetrock mud patches. I cut in the same day and my mom came up the next day to help with painting. The color is the same gray we used in the living room, dining room, hallway; Gray Horse by Benjamin Moore. The pink that we are using on 1 accent wall is called Powder Pink. It is a Glidden color, that I had color matched at Sherwin Williams.

I got the paint with the primer since it's such a light pink I was worried about coverage over the tan and I must say that I am very disappointed with this paint! Not to throw any store under the bus, but when it comes to coverage Behr paint is SO much better. At $52 a gallon for the paint + primer at SW I didn't think I'd have to put 3 coats on. The gray went over in 1 coat (with a few areas of touch up). The SW paint almost seems watered down compared to Behr. I've always loved how thick that stuff goes on. Lesson learned.

Here is an after shot of the pink accent wall:
I worried about not liking so much gray in our house, but I love that so much of our home flows together! You can see the nursery from down the hall and with the natural light in there it doesn't look like the exact same color. I do eventually want to paint our master bedroom, but I think I'll go a shade darker in there.

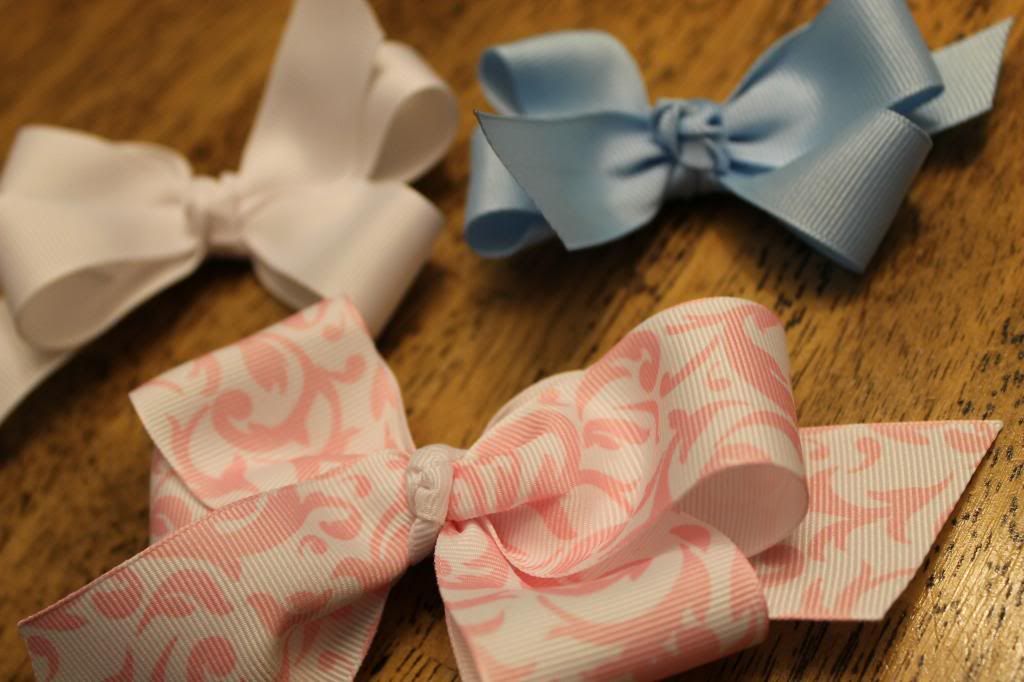
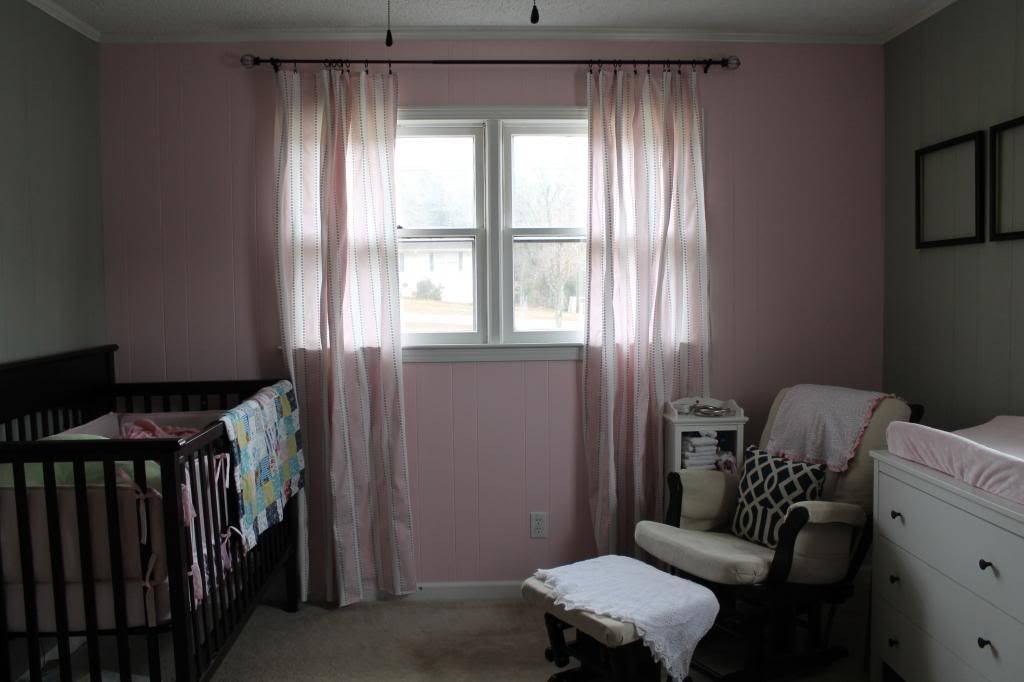
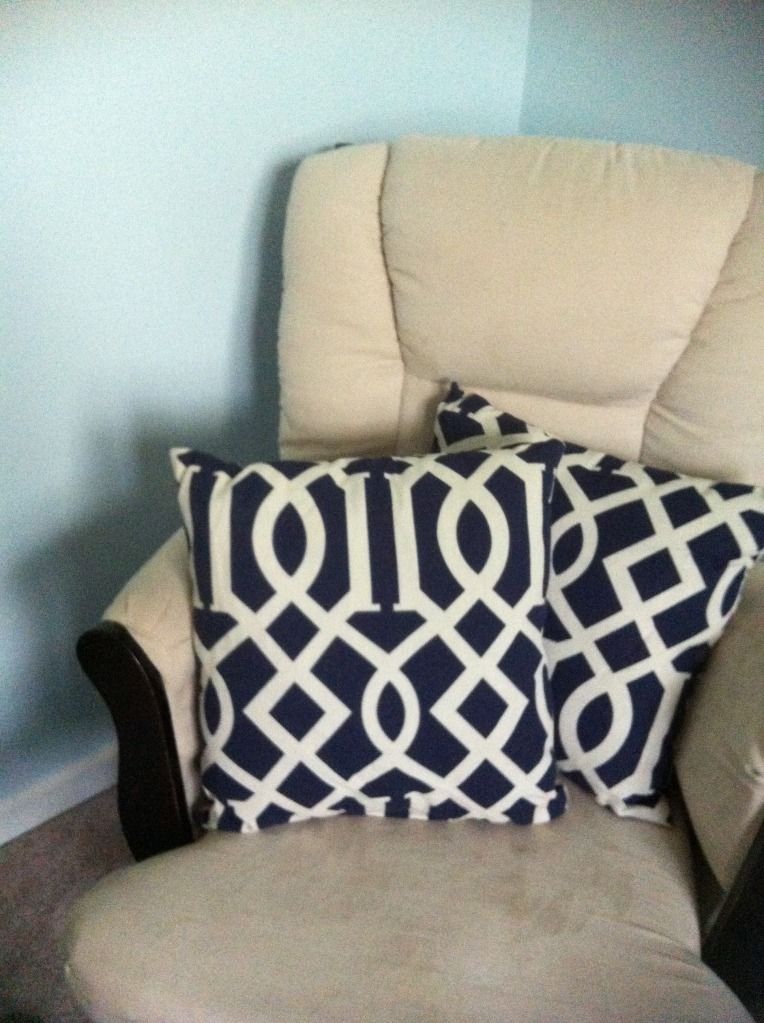
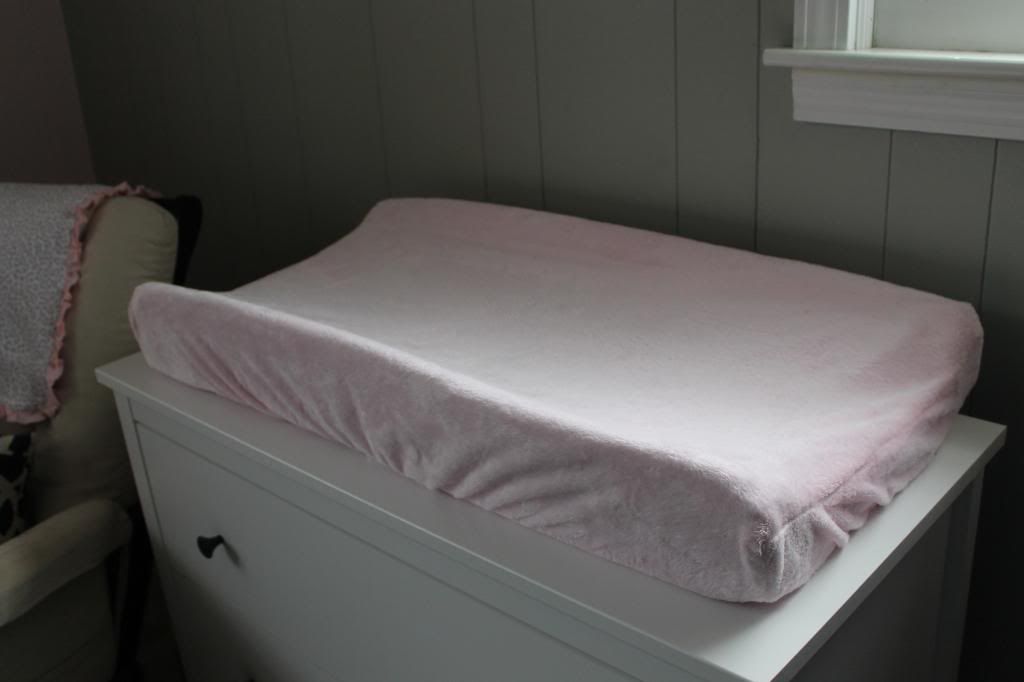
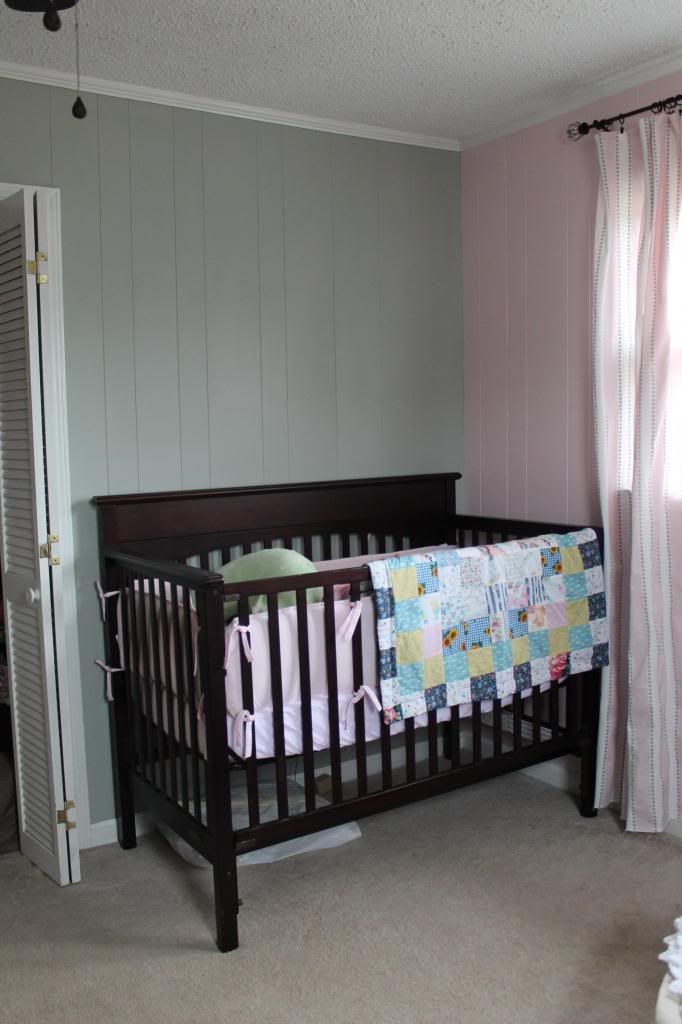
The nursery colors are gray with pink and navy accents. More pink than navy. I am super excited about being able to use the throw pillows from Luke's room (since the rocker is no longer in there) and his old changing pad cover!
Speaking of changing pad covers... I also wanted a pink one (so one can be in the wash while the other is on the changing pad). I had my eye on one on Amazon and it was around $10. I kept my eyes out at consignment stores I frequent and found the EXACT same one for $3.99! Buy used and save the difference!

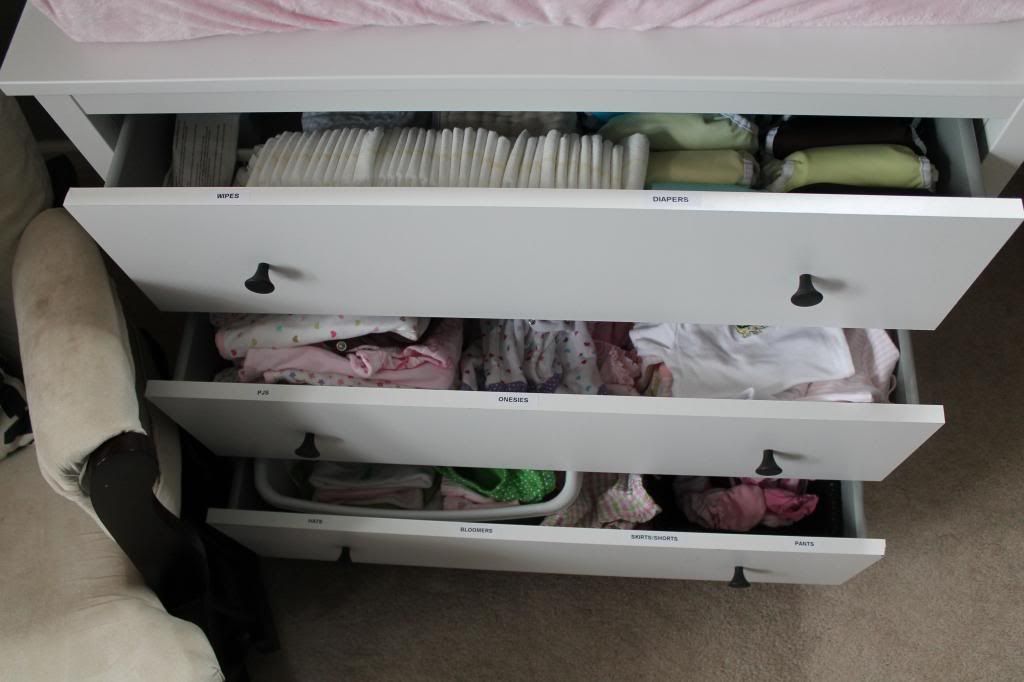
The dresser came from IKEA...

...and is already filled with baby goodies. I have bought maybe 3 outfits for this baby. We have received SEVERAL hand-me-downs from some amazing friends. The cloth diapers make me giddy happy! and teeny tiny newborn diapers are just so sweet. You forget how small they really are!

We decided to keep the futon (even though the "plan" was for it to be a guest bed). It's easier to pull out than an air mattress and it's nice to have somewhere to sit in the nursery. The brassy lamp will be re-done later this month.

The futon is waiting for some throw pillows. Still thinking on those...

The crib is set up and ready to go- I know bumpers are widely debated in the baby community. We had them with Luke and plan to with this baby as well. We took them out for a few months once he was able to roll over and then put them back once the SIDs risk dropped after 6 months. We'll probably do the same this time around. Of course this crib is filled with extra sheets, and other stuff that will go in an under the bed box.
I refused to spend a ton of money- Luke's bedding set was a generous gift from my coworkers. I just couldn't stomach spending $150 on girl bedding when I knew I could do it cheaper! The bumpers came from Amazon for around $30. It's minky softy goodness. The crib sheets are from IKEA and Target- I spent right at $20 for 3. My mom made me a quilt with left over fabric from outfits when I was a kid. Amazingly? It's mainly pink and navy! Another reason we're going with those accent colors. We have barely used Luke's quilt- it looked pretty draped over the crib or on the rocker, but not used daily. I suspect this one will be the same. The skirt I am still brainstorming. I am either thinking a simple paneled skirt like this made from leftover curtain fabric:
or this...  a great tutorial for a faux/velcro-ed crib skirt. I may be hacking this idea as well. (oh I just love that blog so much!)

The curtains are up! After a lot of procrastination I finally got it together.
I found an amazing deal on fabric.com right at the beginning of the new year. I was budgeting to spend around $75 on them, and with a clearance sale they ended up being right at $50 (with free shipping). This is over 9 yards which boils down to $5.50 a yard. Not bad! I have about a yard and a half left over- not sure if I'll make a crib skirt, sew some throw pillows, or do both! Still deciding.

We will hang some black out roller shades behind the curtains. This was the easier option compared to buying blackout material and lining the curtains. All I saw was $$ and time. We have already purchased 2 (need 3)- we debated between the "room darkening" or "blackout". At $10 the room darkening work well, but they don't compete with bright western sun. That shade will go on the single window on the right side of the room. The blackout shades are $20 a piece and are well worth the extra $10. They are literally double the thickness of the room darkening shades. We need to grab 1 more to finish the far wall.

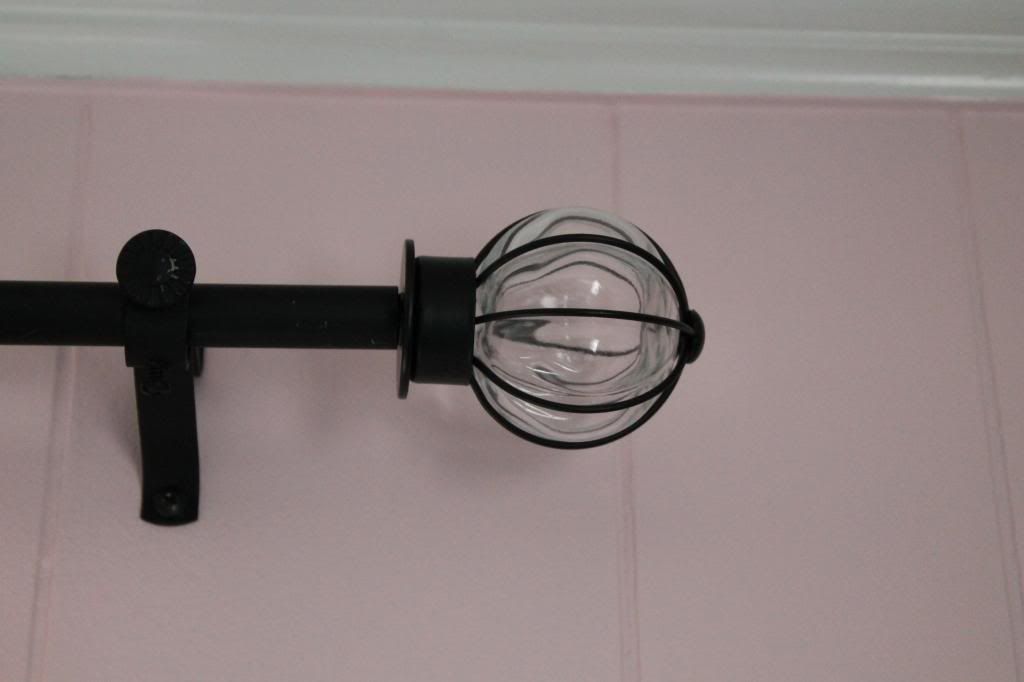
We reused the same curtain rods that were already there but swapped out the finials that came with the house. They resembled arrowheads?
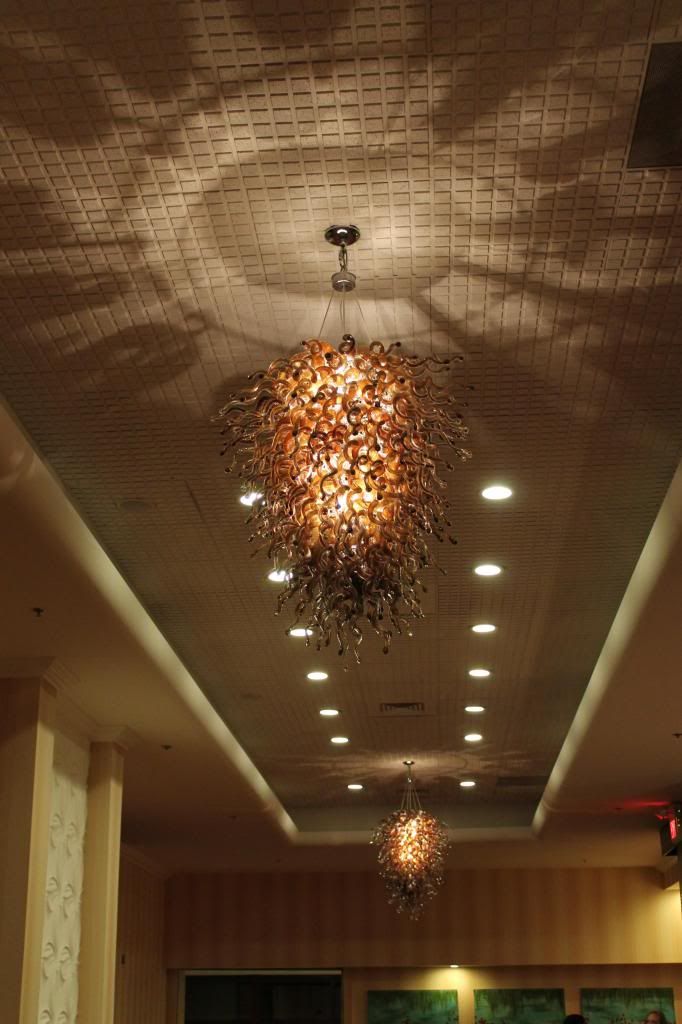
After our curtain remix in the living room this summer I realized how easy it is to buy new finials for old rods. I scored the new ones at IKEA. They remind me of an Edison Chandelier that I LOVE. Swapping the old arrowhead ones out for the new glass ones was not as easy as the living room curtains- but all's well that ends well right? (we ended up having to use sheetrock anchors to hold them in place). If I remember correctly they were around $7 for each window.
We also raised the rods 4ish inches. It makes all the difference in the world! (it's a habit to put the hardware right at the trim on the window. But raising it up adds so much height to the room. It's something we're slowly doing all over the house). If you scroll back up to the 2nd picture in this post (the one with the green curtains) you will see how low they were- with the tabs you could see the moulding!
The closet came together nicely too! I like the toys stored in there when baby is small and then swapping out the dresser/bookshelf once she gets bigger (just like we did with Luke).
The closet was blue so it has come a long way! Although the office had been painted, we never touched the closet, so it was in desperate need!

I still feel like this space is unfinished. Here is what is left to do-
  • Buy remaining needs:

1. Angel care monitor   2. Sound machine (we have this exact one for Luke and we love it   3. Wet bag 4. Sit and Stand Stroller   5. Cloth Diaper safe diaper rash cream.
  • Make pillows for futon
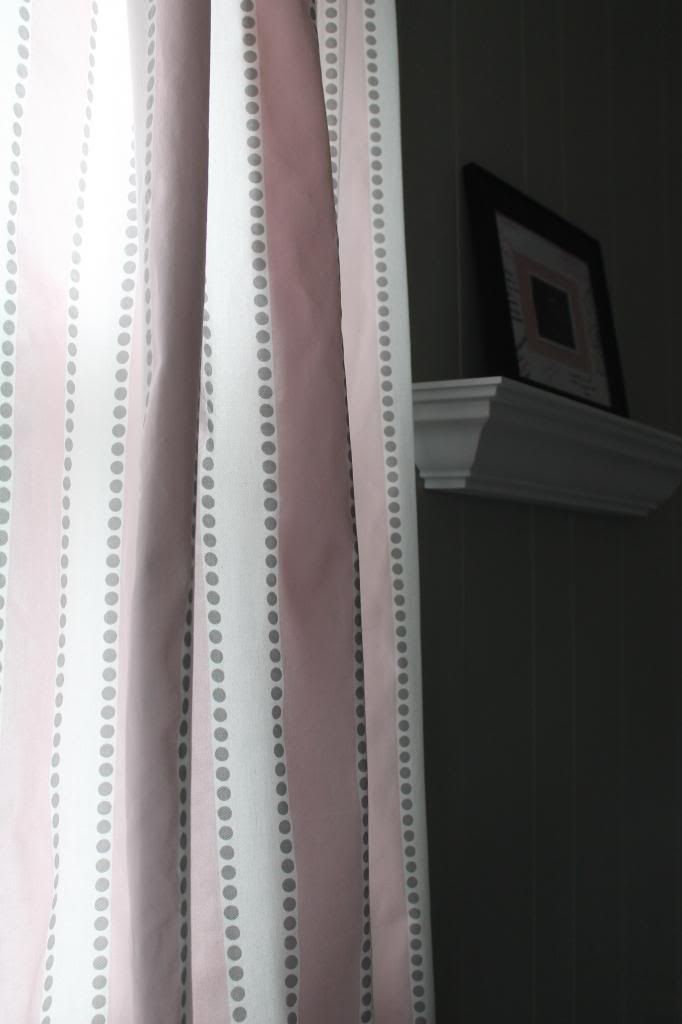
  • Put her monogram in vinyl over the crib. 
  • Fill the empty black frames (a verse in 1, button art in the other)
  • Collage wall over futon
  • Something on either side of the large window
  • finish hemming the curtains. The bottoms are still the raw edges.
I hesitate saying that's all- because I'm sure there's more. But I would LOVE to not have anything to do in there but wash clothes! What a relief that will be. I am SO loving this space and I can't wait to welcome our little girl!

Also, once I finish everything, I plan to do an updated post! I have just been itching to show what all we've done! It feels like such an accomplishment to see it all together in one post!