Recipe Rut: que the recipes!

I posted a few weeks ago about getting over my fears and tackling some freezer meals. All total I made 29 meals. I thought I had some materials to make a few more marinades (I ran out of meat), but I let the limes and cilantro mold and I have since used the BBQ sauce in another recipe. I planned to make a couple baggies of Cilantro Lime Marinade and a BBQ Marinade using apple cider vinegar and some brown sugar.

I promised another post with the recipes included. I found these recipes from many different sites, and some are my old favorites. Unfortunately I have no idea where to link them to- and many of the recipes I came across had been linked from somewhere else.

Chicken Broccoli and Rice Casserole
10C cooked rice
4C cooked chicken
4C chopped broccoli
2 cans Cream of Mushroom soup
2 cans Cream of Chicken soup
4C shredded cheese
salt/pepper

Mix and divide into 4 gallon sized freezer bags or 2 large disposable casserole dishes.  Thaw and bake at 350 degrees for 25-30minutes.

**Prep the rice beforehand. I made all 10 cups of rice the day before in the rice cooker.

Cilantro Lime Chicken


1lb. chicken
2Tbs. Extra Virgin Olive Oil
2 med. limes/juiced
2 med. garlic cloves
2Tbs. fresh cilantro
1/4tsp salt
1/4tsp pepper

Mix all ingredients and pour into freezer bag. Thaw and grill or bake.

Cheesy Enchilada Casserole

1lb. ground beef
2 1/2 cups of salsa
1 can black beans
1/4C. italian salad dressing
2Tbs. taco seasoning
1/4tsp. cumin
6 tortillas
1C. corn (we don't eat corn)
3/4C. sour cream
2C. cheese
1C. lettuce- save for serving
1C. tomato- save for serving

Cook beef. Drain. Stir in salsa, beans, corn, dressing, sour cream, taco seasoning, cumin. Layer in pan- meat, cheese, tortilla, meat cheese. Cover with foil and bake 400 degrees 25 minutes.

The rest of my recipes are really just old favorites... meaning I don't measure.

Manicotti
1 egg, ricotta, mozzarella, garlic salt/powder, onion salt/powder, oregano mixed together and stuffed in shells that are already boiled. Top with spaghetti sauce and bake.

Taco Soup
I throw rotel, taco seasoning, black beans, beef, and really whatever else you have (corn- we don't like corn) and heat in crock pot.

Greek Chicken
Chicken, greek seasoning, lemon juice. Thaw and grill or bake.

Fajita Chicken
Taco seasoning, chicken, lime or lemon juice, and cilantro. Thaw and grill or bake.

Lasagna
I literally just follow the recipe on the box- noodles, meat, mozzarella cheese, ricotta cheese and sauce. I always buy oven ready lasagna. No need to boil beforehand- the noodles cook with the juices in the oven.

Chili
I just throw these ingredients into a crock pot.

and to break up the monotony of the chicken and beef, I threw in some pork chops seasoned with worcestershire sauce/olive oil/ and a pork rub. Yum.
If anything hopefully this post gave you more recipe ideas to break up the "what's for dinner?" question we all hear! I know I'm always looking for new recipes to make!

Cloth Diapers: The Cost Breakdown

This is part 4. See parts 1, 2, and 3 to get the whole story :)

I've always been curious about how much I've really spent on diapers- so in this post I'm going to break it down. There'll be alot of numbers and it may get confusing, but for the sake of savings totally worth it!

Just for comparison, I found that disposable diapers cost between 17-19cents a diaper. It was a really great deal if I could find them between 12-15cents.

Just over the course of Luke using cloth we "saved" $115 (if you consider diapers are 17cents. If they are 19 cents it would have been $130). Now I don't really consider that savings because we turned around and spent that on cloth.  We really haven't seen diaper savings until Emberly because most of the "savings" went in to buying cloth. BUT remember with Luke we only used cloth for 6 months of nights/weekend/holidays, and a third of a year of nights. Most kids would wear them for 2-2.5 years exclusively.

As for how much I spent on my stash- it's hard to pin point a number. I have sold a good portion of my newborn stash (that I didn't even talk about in the first post), and turned that money around to buy more cloth, so it's like a revolving door! Companies run sales (like if you buy so many diapers they'll throw one in free), so I'll have to estimate (on the high side) what I've actually spent.

I have 8 BG 4.0s. I spent around $13 per diaper. I bought most of them as seconds on Jillian's Drawers. They have a diaper trial and after people have sent back what they don't want, they resell them at a discounted price (many times $4-$5 off PER diaper). Many have been used only once or twice. So 8X$13= $104

I also have 4 Flips which run around $11 ($14 new). Total: $44

Our Bumkins prefolds were $17, and our Thirsties diapers (which I've sold half of), were $13.25 each. I turned around and sold them for $7.50 each. So after figuring up the difference they ended up costing me $46 for the life of 8 diapers (which was about 4 months). That's the price of 1 pack of boxed diapers which we used to go through every 2 weeks.

The Swaddlebees and Blueberries (which I just bought) were $37 for 5 diapers and a bunch of inserts. Remember I can resell any of these for at least half of what I spent.

So what's the savings comparison?

For Emberly, I started her in cloth around 4 weeks. I anticipate that she won't start potty training until 2.5-3 years old. She goes through a MINIMUM of 5 diapers a day (many days it's 6-7). But let's just figure 5 a day for 2.5 years= 4,550 diapers. If each diaper cost 17 cents that would be $773 (for Emberly) + $130 (Luke)= $903 MINIMUM spent on diapers (is anyone elses mouth hanging open?). And that's totally estimating low.

What I've actually spent:
$104- Bum Genius
$46- Thirsties (difference left after selling them)
$44- Flips
Bumkins (prefolds)- $17
Swaddlebees/Blueberries- $37
Total spent on cloth: $248 (and I can resell most of this at 50% what I originally paid like I did with my Thirsties). I can possibly come out spending just $125 out of pocket for diapers after selling!

Not bad at all!

Wipes: cloth or disposable?

both!

This is part 3 of the journey we started on Monday.

So what about wipes? Cloth or disposable?

We have cloth wipes and we use cloth wipes about 50% of the time.
I made my own using cut up flannel baby blankets and terrycloth bought by the yard at a fabric store.

When I made them I cut them in 2 sizes:
I really only use cloth wipes when we are home. In my opinion it's easier to use cloth wipes when you cloth diaper. It makes it much easier to roll everything up and throw it all in the wet bag.

When we go out, disposable wipes are easier to grab and go. I do have to think to keep out the wipes and throw them away since it can't go through the washer.

To make cloth wipes work you have to have some sort of wipe solution to spray on the cloth. I use a peri bottle from the hospital. I fill it almost completely full with water, squirt in 3-4 squirts of baby oil and 2-3 drops of baby soap (Johnson's). That's it!
When we're home this is totally second nature to spray the wipe, wipe the mess, and throw the wipe and diaper in the wet bag. I don't like traveling with the peri bottle because I don't want it to spill so that's why I pretty much just use disposables when we're out and about.

Cloth wipes are actually what got me started on cloth. It was my "cloth world" intro. When we couldn't cloth diaper because of daycare we would always use cloth wipes at home. I probably started this when Luke was 6-7 months old.

I NEVER saw myself doing this, so I promise you that if I can do this so can you! It is SOOOOO fulfilling to open the dryer to a new load of clean diapers and wipes and know that you can reuse them all!!

Troubleshooting Cloth Diapers

I mentioned in the first post that I was trying to explain how we cloth diaper to some friends and they just sat there horrified at what I was saying. I obviously didn't explain it well enough and it made me want to write these posts!

I will also add that I am pretty high maintenance and extremely squeamish and repulsed by smells. So if you're reading this thinking "oh some people are just cut out for this, some aren't" maybe that's true, but I never thought this is something that I would actually stick with/carry through longer than a month.

There are so many miscellaneous things that go into cloth diapering. I figured I'd put them all in one place. These opinions are simply my own.

What about washing? What kind of detergent should I use? Does it use alot of energy to wash/dry?
I wash our diapers with any Free and Clear detergent (Tide/All/Arm&Hammer). I will occasionally throw in some Rockin Green as a booster to fight ammonia stink. The ammonia comes from the build up of pee and detergent. With Luke I washed everything is Tide Original and although the diapers smelled great right out of the wash, they did eventually smell like ammonia. I think the detergent built up on them and it wasn't until the Rockin Green that finally kicked the stink.

We never noticed a difference in our energy or water bill. We have a top loading energy efficient washing machine that only uses enough water for the wash. I always do a hot prewash, then regular cool wash, and depending on how soiled the diapers are I'll do an extra rinse to be sure all the detergent washes out. I prefer to line dry my diapers, but this year I've dried them in the dryer on HIGH because of all the nasty rain. Our dryer also senses how heavy the load is an adjusts the time accordingly.

Won't the diapers stink eventually?
Detergent will eventually build up on diapers. That's why the extra rinse is pretty important. Occasionally I will bleach my inserts and I've come to LOVE Rockin Green Funk Rock as a booster. You can find it here. It eliminates any stink (when I say stink- it's mainly ammonia smell- not poop). Some people will "strip" their diapers with blue dawn dish soap. I haven't had luck with it. It seems to build up on my microfiber inserts.

Stink is either diapers that aren't getting clean enough and the stink is bacteria or stink is a buildup of residue from the detergent it's washed in. This is why it's super important to use cloth diaper safe detergent.

Can diapers be dried in the dryer?
YES. Many manufacturers actually recommend them going in the dryer sometimes. The heat in the dryer helps to reseal the PUL which is the waterproof fabric in the diaper. You absolutely CANNOT use dryer sheets. Dryer sheets build up oil on fabric and it will make the diapers repel water over time. We've simply cut out dryer sheets in our family, even in our regular laundry.

Umm poop. Isn't it gross to put that in the washer?
Poop doesn't bother me. And since having children it grosses me out even less. Breastfed baby poop is water soluble so you can throw the diaper, poo and all, right into your washer. For formula fed babies (my babies!) you do need to dump the poo into the toilet. This is what heebs some people out. I do it as soon as the diaper is changed. I just flip the diaper inside out and shake it over the toilet and it falls out. I've been lucky with the consistency of the poo. I'll leave it at that. It's really not any more gross than wrapping up and throwing away a poop disposable diaper. With cloth diapers the poo goes where it should (down the toilet) as opposed to in the trash. It always made me laugh that daycare wouldn't touch cloth diapers, yet Luke would come home at LEAST once a week (in the potty training days) with accident clothes. We threw that in the washer without even thinking twice. Cloth is the same way.

Also as they start to eat more solid foods the consistency of their poo gets, well..... more solid! So it's easier the older they get.

What's a wet bag and why is a "wet" bag dry?
It's true- a wet bag isn't wet. But wet diapers go in them. Back in the old days people kept pails filled with water in their laundry room or bathroom for the dirty diapers to go in. This is a huge no-no since babies can drown in just a few inches of water. So use a bag! We own 2 wet bags. 1 is a travel bag that goes in the diaper bag that looks like this:
And the other is called a "pail liner" that just gets placed inside a trash can. Ours looks like this one except ours is gray:


Can I use diaper rash cream?
I'm going to state my opinion really fast... We used disposables with Luke for his first 18 months. We had some of the WORST diaper rashes ever. We're talking blisters that bled and oozed. It was terrible. He never had an issue after switching to cloth. Emberly has never had a diaper rash and she has almost exclusively used cloth. To each their own.

There are diaper rash creams that claim they are cloth diaper safe. I'd say it's waaaay better to be safe than sorry. My advice is never put diaper rash cream on without a fabric barrier. Diaper rash cream is made to repel moisture, so if it gets on your diaper or prefold the fabric will do the same. Some people cut fleece pieces that fit along the diaper so the cream stays on the fleece and the baby's bottom not on your diaper.

Stains? Gasp. 
Poop happens. And especially when they start eating solids (we're not there yet with Emberly). I found the easiest way to "prevent" (if you can even call it that) is to get rid of the contents of the diaper immediately. Next realize that stains are inevitable. Putting diapers in the sun (called "sunning" them) is actually the best natural bleach for them. I never thought it would work, but it does. Out of all my diapers in my stash I have 1 with a stain. For the most part they come out in the wash.

How you diaper your kid is totally a personal decision and Josh still won't change a poopy cloth diaper. But I have been amazed at how truly easy it is (being all high maintenance and all) and what it has saved me (I'll break that down on Thursday)!

Our Cloth Diaper Journey

I realized as I was trying to explain to someone the other day about how we cloth diaper that I did a pretty pathetic job. It's hard to explain in person all the details that go in to cloth diapering. And everyone who cloth diapers has a different journey. I am by no means an expert and there is still alot to learn, but here's part 1 in our journey:

I started all this back when Luke was 18 months old (he's almost 4 now). Yes, he was pretty old to begin cloth diapers, but we knew that we would have more children eventually. Luke used them from 18 months to 2 years (so about 6 months at night and on the weekends and holidays- daycare wouldn't touch them). After some quick calculations he used cloth diapers 558ish times in those 6 months. That's 558 diapers we didn't have to buy. I'll break the calculations down in another post. 

At 2 years old daycare insisted that we start potty training, so we did. He still wore diapers at night for the next year and a half. We half heartedly cloth diapered during this time- sometimes we used disposables, sometimes big boy underwear, and sometimes cloth diapers. So a third of a year is approximately 121 days. That's another 121 diapers we didn't have to buy. 

We originally bought 6 Bum Genius 4.0 diapers. They are one size pocket diapers meaning they grow with your baby from 7-35lbs+. Notice how these are snapped? This is like a "medium" size. Emberly is 16-17lbs and they fit her perfectly like this. Those snaps enable you to make the diapers bigger as your baby gets bigger.
Here the left orange one is unsnapped and the right green one is still snapped. They can also get smaller if you snapped them to the lowest row.
Goodbye grandma's cloth diapers! You no longer use diaper pins when cloth diapering (yikes!). They  make diapers in snaps or aplix (which is velcro). I prefer the snaps, but I did end with one aplix because after ordering 5 I got 1 diaper free so I wasn't able to choose what I wanted (snaps or aplix) or color. They sent me aplix in white.
The pocket part means there is a pocket built in where you stuff the inserts. These are very similar to disposable diapers which is why they are so popular. You pretty much have 2 pieces- the diaper and the insert. The diaper outside (the colorful part) is PUL (Polyurethane laminate fabric) which is waterproof. There is an additional layer inside that makes up the "pocket". This is soft absorbent material. The insert, which is made of microfiber, is stuffed between the outside PUL and the inside absorbent layer. Pocket diapers can only be used once before they need to be washed (just like a regular diaper- that you would throw away). 
Size wise both my kids were over 7lbs at birth and there was no way they would have fit in the 4.0s that early. In our case they needed to get chunky thighs before the diapers would fit snug enough to not leak. On the other end Luke wore them until he was 40lbs. Sizing just depends on how your kids are built.

Pros of pockets: They are alot like disposables. Also you can stuff more inserts in the pocket if your child is a heavy wetter (like an extra insert or a burp cloth).

Cons of pockets: You have to un-stuff and re-stuff the diapers before and after each wash. I'll talk about washing in another post. This really isn't time consuming and you fall into a routine, but you do have to do it. Some people don't unstuff the diapers and claim that the inserts fall out in the wash. I've tried it a few times and it's about 50/50. I prefer to manually to unstuff so I ensure the insert gets totally cleaned.

Because these didn't fit until around 16lbs for us (and I have chunky babies!), I opted to purchase 8 Thirsties Dup Pocket Diapers size ONE. Thirsties is just another brand (like Bum Genius). Instead of making them one size fits all, they have 2 sizes- Size ONE fits 6-18lbs and size TWO fits 18-35lbs. This way I could use these until she grew into her Bum Genius. Here's a side by side comparison of the 2:
Obviously the Thirsties on the left are smaller because they fit for a shorter amount of time. I'm convinced that I got a more accurate fit when she was tiny with these. 

She has completely outgrown her Thirsties :( I almost cried. One day I sat her up and the snaps popped open. I figured it was time to pass them on. They are listed on ebay in hopes of them selling!

After the original 6 BG4.0s I ventured out to try the Bum Genius flips. These are diaper covers that use prefolds as the absorber. By outside appearance, 4.0s and Flips look exactly the same:

but they are very different!

Basically the outside shell is waterproof PUL, and you place a prefold (pretty much a super absorbant burp cloth) inside the shell.

Here's what a prefold looks like next to the diaper.
Because I have to snap the diaper a little smaller, I have to fold the prefold down in front. That's ok because she just has more absorbency there!
The great thing with diaper covers is that they are cheaper than pocket diapers and they can be used more than once before washing as long as just pee is involved. If I'm changing her diaper and it's a prefold/cover I dump the prefold in our wet bag, wipe the cover with a wipe, and let it sit to dry. I'll put a different clean diaper on her for the time being. Once it's dry (at the next change) I put another prefold in and we're good to go until the next change. I do this approximately 3 times before I actually wash the cover (as long as it doesn't stink and there is no poop). Remember the cover doesn't actually touch the skin, just the prefold and the prefold is fresh at each change. 

Pros: They can be used more than once which='s savings.

Cons: You have to stuff them, and they are harder to get a perfect fit. Also your prefolds have to fit in the cover of the diaper.

Many prefolds come in different sizes for various absorbency. We loved Osocozy's better fit infant prefolds for the baby infant stage (up to about 14lbs) and Bumkins Premium (which is technically size large) for the stage we're in now (15-30lbs).

Hands down pocket diapers are easier and much more like regular disposable diapers. Josh prefers pocket diapers over prefolds and covers. I don't care. I think the prefolds/covers are fun because I don't have to wash them at each change so one diaper can actually last 3 changes during the day. But I do love the ease of pockets.

They also make AIO (All in Ones) that don't have pockets. I haven't tried these because they are pricey.  They are diapers where all the absorbent layers are sewn together and you wash everything all together so there's no stuffing involved. All this stuffing talk is making me think about Thanksgiving, and turkey!

I just bought 5 more diapers since I had to transition out of our Thirsties. We now have 8 BG 4.0s, 4 Flips, and 5 Swaddle Bees and Blueberry pockets. These last us about 2 days which means I'm washing diapers every other day to make sure that we have enough to finish that second day. It sounds like alot, but I enjoy staying on top of it.

If you have more than one kid in cloth you would obviously need more. Luke became fully night potty trained a month after Emberly was born. Amazingly their cloth diaper journey never overlapped because she didn't use cloth diapers that first month! We received so many diapers as shower gifts that her little bum was covered that first month!

Check back the rest of the week for what we do with wipes (cloth or disposable?), when we have to troubleshoot (how do we wash? what to do with poop? diaper rash cream? stink?), and the cost breakdown/savings.

I do not cloth diaper to "save the earth" although that is a benefit. I cloth diaper because I have seen the difference with my own eyes of how they contain blowouts (we've never had one with cloth), and how gentle they are on their bums! We've never had diaper rash with cloth. 

High Five for Friday!

1. Emberly has started making the funniest sounds. She keeps her mouth shut and then talks. It's really hilarious.

2. Josh started his on the job training this week. He's no longer in a classroom learning but he's getting to see the hands on stuff. His shift was 2pm-10pm this week (which was actually kind of refreshing). I like that just about every month his shift changes. It keeps things fresh.

3. Luke finished another week of preschool! He loves it so much and he is learning everyday! I feel like it's much different than "daycare" preschool.

4. We got most of our house paperwork submitted. Now it's just a waiting game and we are still waiting on a paycheck. Our government has GOT to figure this mess out.

5. Emberly is still sleeping poorly. I finally broke down this week and pulled out her sleep positioner. I know it's a no-no for SIDS, but it's the only thing that keeps her from rolling over. If she rolls on her back she screams, and that was happening at least 10 times a night. Josh suggested velcro pjs with a velcro crib sheet... we'll try the sleep positioner first ;)

iPhone pictures: what to do?

So I am back to organizing photos. I've spent the majority of this week and last organizing pictures. Hardcopy and digital. I swear it NEVER ENDS.

A few days ago I shared about Project Life. Now I'm here to share what in the world to do with all those iPhone pictures. If you're like me you have 1000+ sitting on your phone and computer.
Every time I updated my phone I would do an iPhone dump. I'd copy all my files on to my external hard drive. Except sometimes I didn't empty them off my phone... which meant I'd end up with copies of copies of copies.

Just sitting. I seriously had a trip down memory lane seeing these! Pictures all the way back to when Luke was born.

I didn't jump on the instagram train until recently. I realize this will be 128457809274times easier now since I have pictures on there but I also don't upload every photo to instagram. I think my friends would hate me if I blew up their feed with my kid's pictures.

So what to do?

I realized that as I was assembling my Project Life binder that a huge majority of my life are recorded on my phone. And I wanted those pictures in my book.

I jumped on Dr. Google and he brought me to this site. She gives AWESOME instructions for how to print instagram pictures cheap at Costco and how to print iPhone pictures using another method. I will be using her method for the pictures already on my phone. My issue was 1/2 of my pictures weren't on my phone. They were backed up on my external hard drive. And I had no idea how to print them at the drugstore or Walmart without the formatting being off.

I realized that I could probably do this on Picmonkey. I love Picmonkey.

To walk you through this I took screen shots. Remember I had all these stored on my external hard drive. I weeded through them and copy/pasted just the pictures I wanted to print into a new folder labeled "iphonetoprint" on my desktop (that way I wouldn't have to keep flipping back and forth from the external hard drive to my desktop to Picmonkey).

This is done on a Mac. If you don't have one, I have nothing to offer but my condolences.

Only kidding- I'm sure it's just as easy on a PC. Just different keystrokes.

First I pulled up Picmonkey.
and clicked "Create a Collage".

The issue with iPhone pics is they are smaller than the traditional 4x6 photo. But they're not a perfect square 4x4 like Instagram either.

So I pulled up a basic 4x6 frame with a place for 2 photos. Notice the far left sidebar looks like a collage. This is called "Ducks in a Row" and I clicked on the only option to give me 2 photos.

Next came uploading pictures...

On the left side bar click the icon that looks like a mountain/moon and then click the "open photos" button. Choose the folder where you saved the pictures and click on the 2 you want.
I only uploaded 2 photos at a time. Since Picmonkey doesn't save pictures on their site, there is no reason to choose more than you are using. It's just a waste of time because you'll have to do it again for your next collage.

The 2 photos will pull up around the "open photos" button. Click and drag the photos to the desired location.
That's it! Now click "save" at the top right above the picture.

This screen will come up:
Save it whatever you want wherever you want. I saved it in the same folder, that way they were all contained when I go to upload and print. Also you don't have to exit out of this screen to do another print. You can just keep saving over the picture before. Picmonkey doesn't save anything to their site so once you save it to your computer, it's saved. After weeding through the 1000+ pictures I weeded it down to 148/2 per print=74 prints to pickup.

I downloaded the files and had them printed at Walmart only because I can do it quickly through their site. They print the standard 4x6 size.

I also still have some prints on my phone that I'm going to play around with. I am going to follow the link at the top to get my Instagram pictures and current phone pictures off my phone. I already downloaded the Picframe app.

Now for the fun part.

Each 4x6 picture can be cut in half to make a 4x3 size photo. This is the exact size of the journaling cards in the Project Life kit!

So each of these pictures can be "sprinkled" throughout my binder! So excited about this because I don't have to buy different size dividers or worry if they don't make that size! Especially on this page when there are so many places for 3x4 cards that seemed wasted before!
Also keeping in true Project Life style I am not cutting any pictures except to cut the 4x6 print in 2 to make 2- 4x3's. I sat on the couch in from of my favorite show and had all the cutting done in no time (with no snippets- that's what I used to call the tiny little cutting pieces when I was a teacher).
That's it! Pretty easy- and I'm excited about playing around with the photos on my phone!!

Recent recap!

The past month and a half have flown! Here are some recent updates:

Emberly turned 3 months old. I can't wait to get all her monthly pictures together!
 This face makes me laugh harder the more I see it!
Daddy took Luke to his first movie! They saw Planes together and had the whole theater to themselves!
 The boy loves his sweets!
Here's the house we're under contract on! The inspection went well and our fingers are crossed that all the paperwork goes through despite the government shutdown. 
Such a pretty girl. She's wearing the dress Mrs. Madeline made me. She has her own dress made by Mrs. Madeline that will fit her this spring.
My prison guard all ready for his first day in uniform! He passed his test last week and we now have a shift schedule until December! It's so nice to know what the next few months look like!
That sweet face is almost too much to take. I just want to gobble her.

Little man hardly ever just falls asleep. I love it when he does though!
Josh was ordering uniforms one night and she fell sound asleep in his lap. It was so sweet. 
Love my little family!

Project Life

It's taken me a while, but I've finally jumped on the Project Life proverbial wagon. If you're not familiar with Project Life go here. I wasn't either besides hearing about it word of mouth and reading about it on some blogs.

Before I continue, I should say that I was NOT PERKED or paid in anyway to share my thoughts and feelings about this product. Just a huge believer in sharing something I love.

In a nutshell, Project Life is scrapbooking for people who don't scrapbook. Let's rewind. I used to scrapbook. I loved scrapbooking. But holy cow it's time consuming. And expensive. And time and money aren't exactly indispensable in my life right now.

I have been really convicted in the past that I need to create tangible memories for my children to remember their childhood. I'm convinced that most of the reason I remember my childhood is because of the photographs that surrounded me. I loved pulling out an album and flipping through baby pictures, and even looking at pictures from before I was born.

Back in the old days it was easy. Every picture you took had to get printed and then they were popped in an album. But today with everything being digital it takes time to dig back through photos, choose the best ones and have them printed. Then deciding where to print them, pickup or home delivery... the decisions are endless. Sometimes I just wish life were simpler!

A year ago I got all our loose photos in order. You can see that process here and again here. The whole reason I did that was to be able to go back and eventually create these albums. I was headed in the right direction but I ran out of steam. Oh yeah and I got pregnant ;)

I decided to start in the here and now meaning I would pick up where we are today. I do want to backtrack and do the last 7 years eventually. But this will be a process. A process I'm not rushing myself to finish.

So I grabbed my external hard drive (where I store all our photos). As much as I despise Wal-mart I know how to work their site and I know they do home delivery if I decided on that. Next I began uploading photos. Over 350 to be exact (that's from January-July of this year and from Luke and Emberly's birth).
I did some quick research about what materials I would need for Project Life. You need the "Core Kit", dividers, and an album. Easy enough for me. Amazon sells these along with many craft stores. I decided to purchase at Hobby Lobby. I love supporting such a great store. I spent $110 on materials to make a large 2013 album, and 2 small birth albums (for Luke and Emberly). I actually didn't go the Project Life route for their baby albums. I'll explain another time. Also it was about $35 for photo printing. I got 25 free prints for opening a new account so you can probably guess what I did.
I didn't use every.single.picture. But I used most. The rest will go in their yearly plastic divider that I blogged about last year and linked at the top of this post.

Also nothing I do will be any different than what the manufacturer website says, but this is just my spin on it. Just felt like I needed to get that out. There isn't going to be an amazing enlightenment or anything. :)

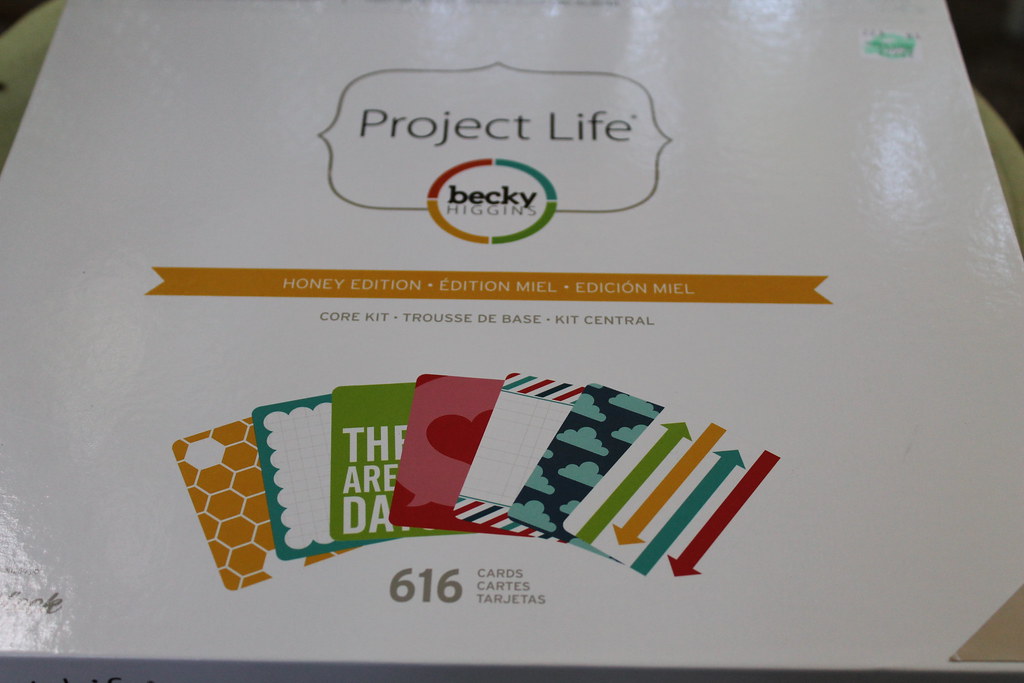
The kit I picked up was called the "Honey Edition". All the types were really cute and hard to choose from! Good thing I'll be getting more!
I opened the box and got my hands all over this paper goodness.
There are pretty much 3 types of cards. 4x6 journaling cards, 4x3 journaling cards, and 4x3 filler cards that have designs on the front and back.

Project Life makes the first and last page super easy. They have pre-made cards with recommended layouts. You don't have to follow their recs but it does make it cute. The first and last page are the only 2 they recommend. The rest is up to you.
And the colors coordinate well.
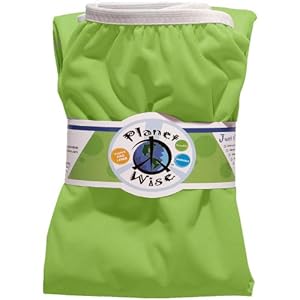
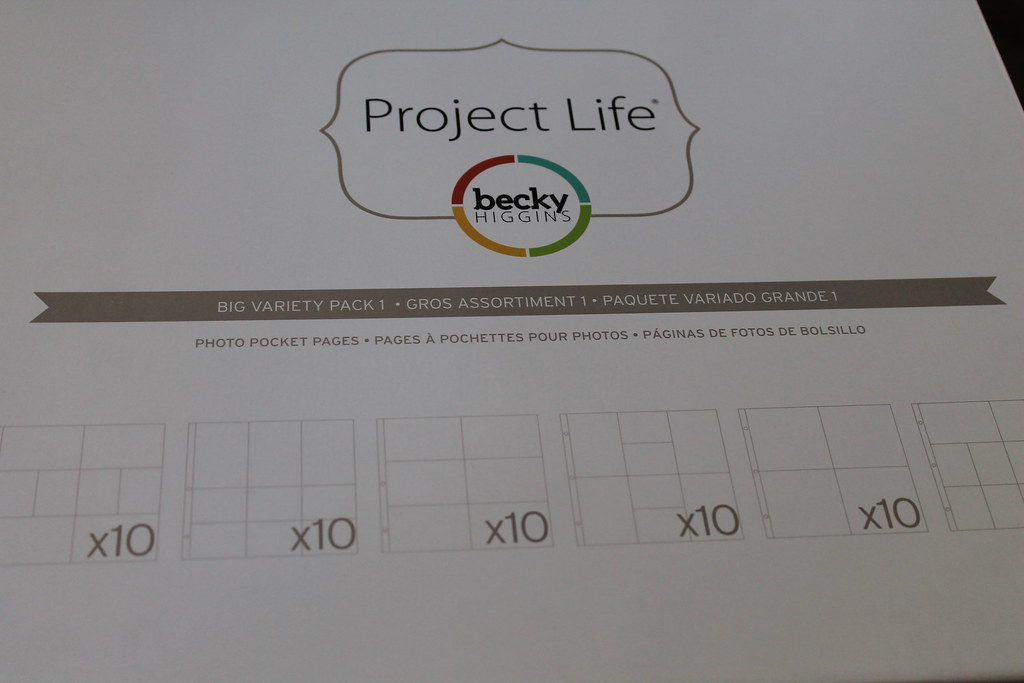
Let's talk dividers shall we?

I grabbed a Big Pack (6 different layouts with 10 of each layout=60 dividers total).
I thought I'd be really on my game and mix them all up so I didn't have too much of one layout in a row. Waste.of.time. Just go with however your pictures are ordered. I found that I wasn't using the order I created, but I needed a layout that had vertical holes... or horizontal... or whatever. Just use what you need. Even if you use the same layout 3 times in a row the pictures and journaling/filler cards will break it up.

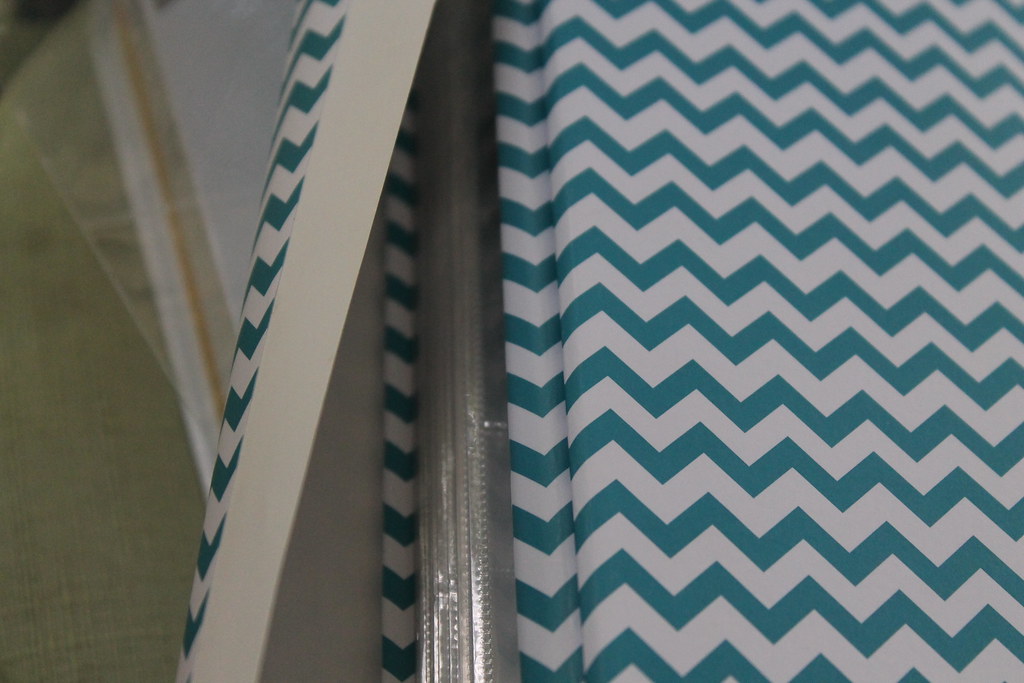
Next you need a book. Project Life sells books made specifically for their products. I didn't get a Project Life book. Hindsight is 20/20. If I could go back I would get one. Oh well. Project Life books are around $22. Mine was $20 with 50% off so it ended up being $10. The main difference is mine has the scrapbook expanders.
Project Life books are 3 ring binders. I think the 3 ring binders would have been 1000xs easier. Also my spine is coming out because my book is so thick.
It's made to move a little but I don't think mine will hold up for the long term. Live and learn.

The rest is easy peasy! Just stick your pictures in, and fill in with journaling and filler cards!!


Just so you know, I tossed around a couple of ideas for how to accomplish these family yearbooks. I could have full blown scrapbooked (HAHA), I could have ordered photo books online (already printed and bound), or I could do Project Life.

I actually started a photo book online through My Publisher. They offer great promo codes and it seemed really easy. Except I spent like 3 hours working on a book one night and my OCD perfectionism went nut-so and I just couldnt' finish. I had only done like 10 pages and my eyeballs felt like they were bleeding and it just wasn't worth it. Layout and cuteness was all up to me and I just couldn't handle it. Also I find it difficult to upload pictures in order and sort them all out. I much prefer to have a hard copy sitting in front of me.

Price wise this was about the same as an online photo book. I was looking to spend between $90-$100. They'll run deals and make it sound amazing, but I take alot of pictures and I would have to add alot of pages at the end and that's what costs the $$. Also shipping was more $$.

I spent $30 for the Core Kit, $30 for the dividers, and $10 for my book. The pictures were another $35 (but I got pictures for this book, Emberly's birth, and Luke's birth).

There is a way to make this project cheaper. You can buy partial kits on ebay. I'm interested to see how many journaling/filler cards I'll have at the end of this year. Since this is a year long book I'm not quite done. But I definitely think it's manageable to take this 6 months at a time. It took me about 2 hours total to get it assembled and start journaling. I'm not done journaling, but I assume it'll take me about another hour.

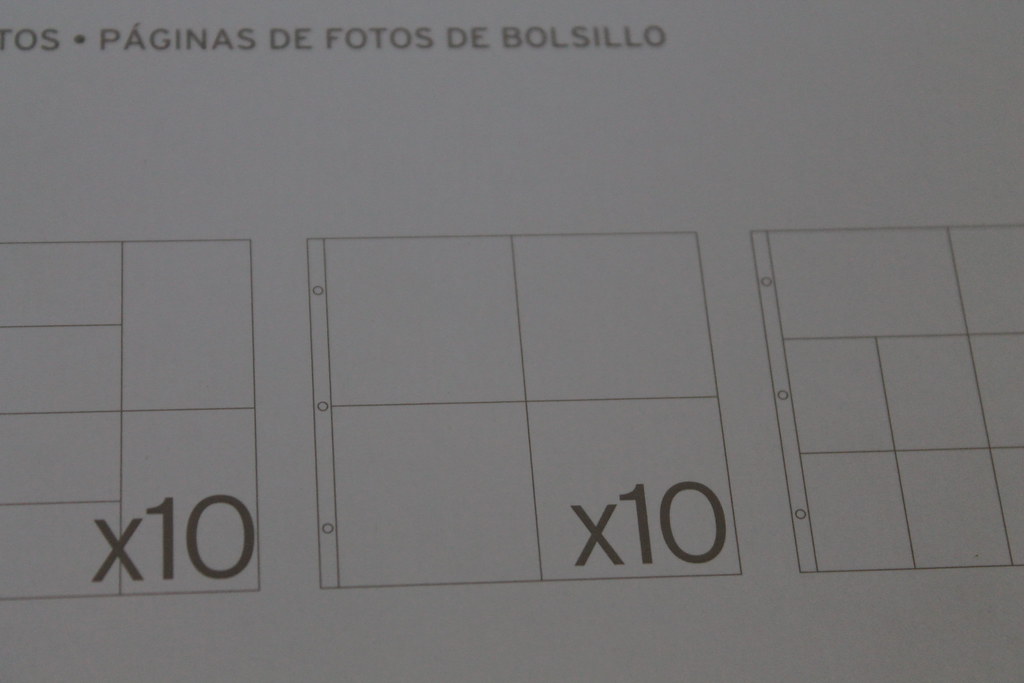
Also I bought the huge pack of dividers. There are 10 dividers I'm not using. And to be completely honest I'm not sure how to use them. They are 6x6 squares?
I know Instagram pictures come in 4x4 and  I'm figuring out a way to get iPhone photos to fit in the 4x3 squares. But the 6x6? Total waste. I probably would have bought the horizontal and vertical dividers separately.

I also thought these dividers were a waste too because you ended up using 1 picture with 10 filler/journaling cards:
but stay tuned! I think I've figured out how to use them!

So overall I'm super impressed with this product. It may seem like alot of upfront costs- which it is- but I think the payoff will be priceless. I can still remember sitting on my grandmother's couch flipping through albums. I want that for my children!

Like I mentioned earlier- I've figured out a way to get iPhone pictures to work with Project Life. I'm not talking Instagram- but just plain iPhone pictures. Project Life does make Instagram dividers. I think I'll grab a few to add into this book eventually.

Phew! I feel like this has been a marathon. Not getting this particular album together but keeping my photos in order digitally, printing what I need, and then assembly. Hopefully the whole huge process will get easier the more I do. And honestly I'm not sure printing them "per month" or as you go would help? Because I'd wonder if I had already printed that picture, or I'd have to find a place to store them. I like just spending a chunk of time and getting it all accomplished.