Let's get it straight...

One of the most difficult things to learn about embroidery is how to hoop and how to center a design. It sounds SO EASY but it takes ALOT of practice to get it right. I actually declared on my most read post to date {my top 10 tips} that I hate hooping... but guess what? After learning what I'm about to share, hooping is NOW my most preferred method! Oh the irony.
I'm going to show how to center a design (including rehooping) and then I'll show examples of how this doesn't always work. If you are reading this and are pretty well read in embroidery then you know the term "hooping" vs. "floating". I started out by hooping everything, but slowly got frustrated because I would pull the shirt too tight and it would cause puckering and small holes. Hooping is quite simply hooping the stabilizer (I prefer precut medium cutaway squares/rectangles for knit shirts) and the shirt all in one step.  I ventured into floating and SWORE by it for a few years. Floating is when you hoop your stabilizer and lay the shirt (or whatever your embroidering) on top of the hoop/stabilizer. You HAVE to attach the garment (either with basting spray, a basting stitch, or pins). I stuck with this method even though it was a pain because it gave me the results I wanted. But about 1 in 5 or so items weren't straight. And I didn't know until I pulled it off the hoop (aka when the project was done) and it was incredibly frustrating. So I went back to hooping because not only did I learn HOW to hoop but I am now getting the results I want. 

So here's my very unprofessional version of hooping AND getting it straight without holes or puckering!

Fold the item in half. I prefer NOT to measure because measurements are different at different areas. Also the tag can be put in crooked or off center, so if you center it to the tag it may be off. I like finding the middle by physically folding the shirt and matching the shoulder seams together.
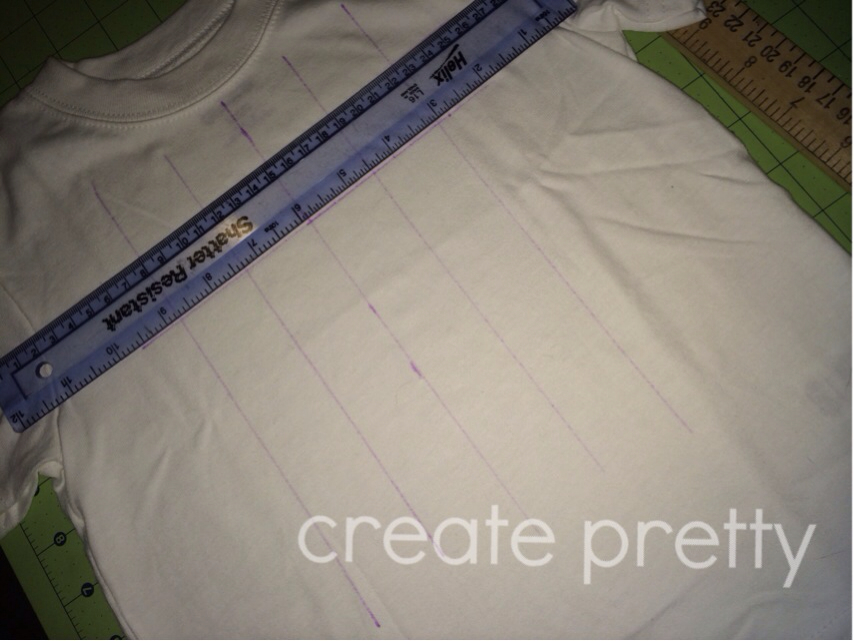
When it's folded I mark 3 small lines down the middle. Think middle school geometry. Then I connect the lines with a ruler and draw 1 long line down the front center. Oh and did I mention it's REALLY important to get the right marking pen? I have had this baby since I started (4 years ago) and it's still going strong! I found it at Joanns and it has worked perfectly. It comes out of the fabric with a couple squirts of water.

After drawing my 1st line down the center, I line up the ruler and draw 1-2 lines to the left of the center line and 1-2 lines to the right. Like this:
Pretty straightforward right?  (punny- I know I can't help it)

Then I have an unwritten rule that I start the appliqué about 1.5 inches down from the neck. If it's a really big shirt (5T+) I'll start is about 2 inches down. I measure and make a mark at the place I want the appliqué to start. Then I make straight lines with my ruler down. I kind of eyeball it against the neck to check for straightness. I usually go 4-5 lines down.

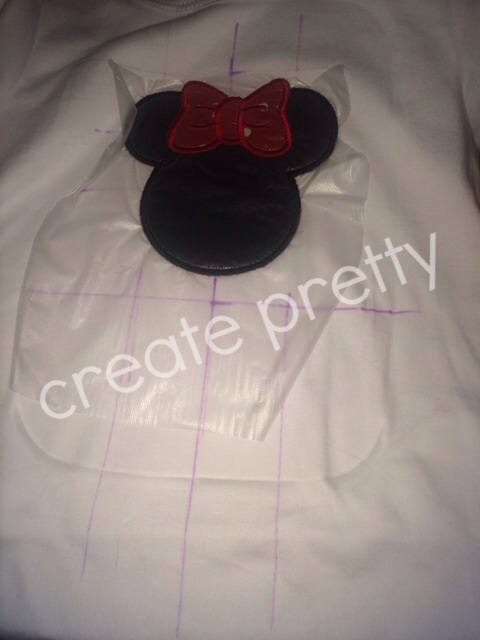
Then I put my hoop in. The bottom part of the hoop goes inside the shirt with the stabilizer. I ALWAYS use my grid. Always. No exceptions. 

I line the center line of the grid up with the center line I drew. I line the top of the purple grid with the top line I drew. Then I pop the hoop together. 
PSA: See how the purple line on the grid DOESN'T match with the hoop? You CANNOT go by the marking on the hoop or it won't be centered! Always use the grid (is the horse dead?). Neigh.

Pretty simple right? I use this technique on every shirt. Of course now that I have it down it only takes about a minute to get it all marked and hooped. For productivity reasons I usually always have my next 2 projects hooped while my machine is running. I love being able to pop one project off and start the next. 

Now what about a name? I was excited about getting my bigger machine to be able to embroider a larger area. But I've found that I run into the same issue as I did with my smaller machine. If I use a 5x7 design I still usually don't have the space to add a name. About 50% of the time I get lucky and it works in one hooping. But sometimes it doesn't. So here's how to handle that. (I do have the monster 5x12 positional hoop- but many times it's just too large).

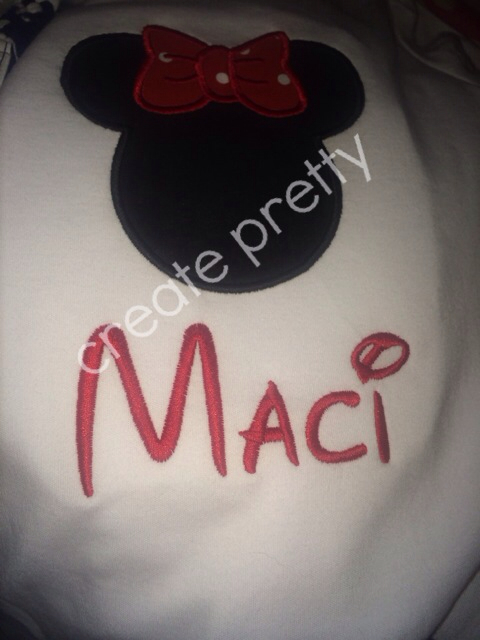
Here's an applique I recently did. The minnie head fit in my vertical hoop, but the name "Savannah" didn't- I needed my hoop flipped to 7inches. But the minnie head wouldn't fit horizontally. I was doing 2 identical shirts and one fit in just one hooping and the other didn't so I had to do my best to get the Savannah shirt to match this Maci shirt:
See how I still have my markings intact from the appliqué? (you can even see my "hoop burn" from the first hooping). That mark comes out with a squirt of water- no worries. 
Once again I marked where the top of the name needed to go. That tells me where the top of my grid will go. 
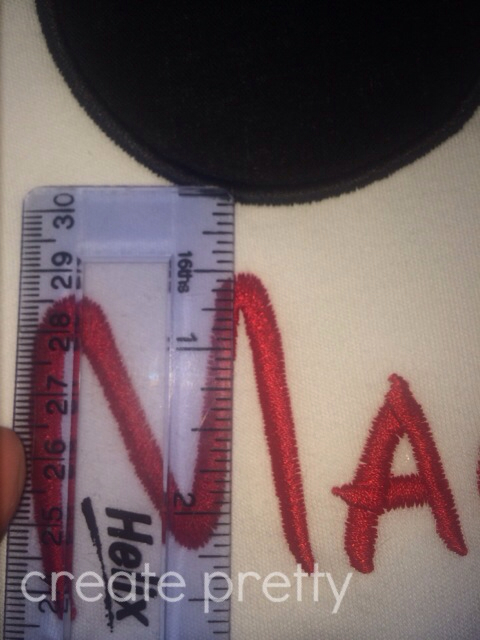
I needed the name to start about half an inch down, so I made my mark and lined up my grid:
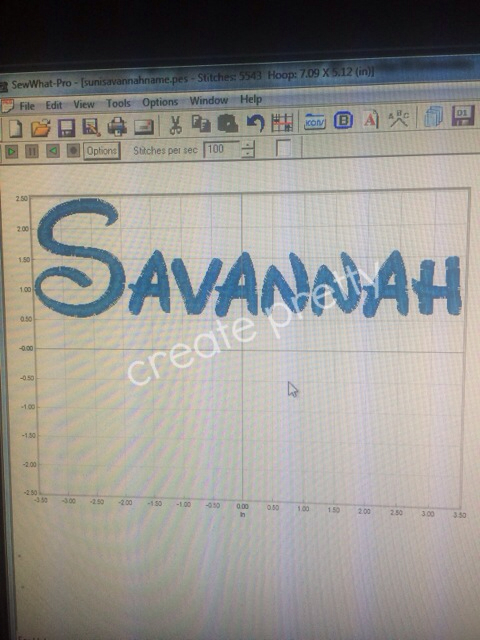
Probably the MOST IMPORTANT STEP of this whole process is making sure that your design is actually at the top of the grid!!! This goes for the first appliqué too! So in my program after merging all the letters I moved it to the top. 
I use Sew What Pro as my program simply because it's what I started with. It does everything I need it to do and I have learned it pretty well. There are other programs that offer other things, but I'm too scared to switch now for the learning curve! Oh and to make life a WHOLE LOT EASIER- join your stitches so it will stitch out the whole name without stopping- not letter by letter. 

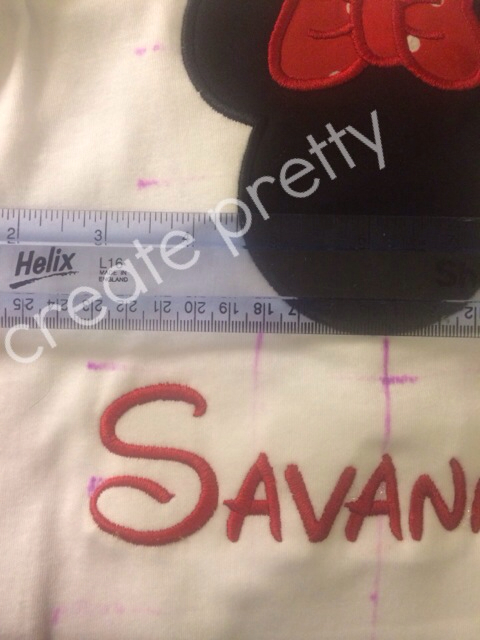
Once it was done stitching I checked to make sure that the name was about half an inch under the appliqué- Bingo!
And the finished product:
As an example of how our eyes can play tricks on us: Visually, the Savannah looks farther down on the shirt. But it's not because the M is closer to the center and therefore APPEARS closer to the appliqué. I measured 3 times after pulling it off the hoop to double and triple check! 

A quick tip I learned is to always center the second center hooping to the first hooping (by extending the marking lines down). If you recenter the name to the shirt it MAY be off since the measurements down the shirt differ. It shouldn't make a difference but I did a shirt once where I centered the appliqué to the shirt and then centered the name to the shirt and the name wasn't centered on the design. It was incredibly frustrating! So I always center the name to the design!

Here's another example of how our eyes play tricks:
This name is clearly centered to the elephant. The L comes right below the tail and the M is right under the trunk, but the name looks slightly off center because the truck is so large and the tail is so skinny. I didn't have to rehoop this one so I am POSITIVE this is centered (it was centered in my program) but at quick glance it looks "heavy" on the right and light on the left. 

See this start shirt. It's nearly symmetrical so the name looks perfectly centered:
Another great example: 
This bird drives me NUTS because the feet are off center. But according to the design the J is under the beak and the e is under the tail. And if I centered the name to the legs it would be even more off! Haha!

So just a glimpse into the many decisions we as embroiderers have to make! I really think I have arguments with myself back and forth before finally settling on a design. And 99% of the time I center it to design (not to a portion of the design like the feet). Thankfully our computers are awesome in showing us what it will look like before it's done so I can visualize it! Isn't it crazy the number of steps that goes into simply hooping a shirt?!

H54F!

I haven't updated in 2 weeks! These 2 weeks have been full so It's going to be hard to pick just 5 things.

1. Last week Luke flushed his undies down the toilet. To say I was mad is a total understatement. I sent him to his room because I needed time to cool down. Had to decide whether to call a plumber or "let it go". Conceal, don't feel right? ;)  I emailed Josh at work so he had a heads up and I didn't flush the toilet until I talked to him. Although I'm sure I can handle a toilet overflowing, I didn't really have the patience to deal with it. The good thing? It's been almost 2 weeks of normal use and we haven't had an issue. Thankfully. He learned a lesson and I learned a lesson. I told him he was no longer allowed to flush. Well his bathroom went WAY TOO LONG without being flushed and I legit couldn't be mad him. Lol. So we are back to normal bathroom practices. No more undie flushing!

2. My van had it's 3rd flat tire in 5 months. The second in a week. I was annoyed. We had just spent $180 to get a new tire due to sidewall damage the week before. Thankfully I think this was just neglect and needed a little air. After examining it and not finding any damage we filled her up with air and so far she's been good. So thankful for the tire notification dingy bell that alerts me of a flat!

3. A week ago we had our 10 year high school reunion. It was great to see everyone and it's hard to believe that in 10 years Luke will be 14! Talk about a slap in the face. Luke took a pretty nasty fall at the kiddie pool where we met and when the life guard started talking ambulance and concussion I kinda freaked (of course Josh had left for work 5 minutes before the fall). But he ended up being fine. I watched for signs all afternoon and besides a pretty nasty bump on his head he was good a new.

4. Luke has been attending VBS all week. We registered him at the church where he'll attend preschool this year hoping to get him familiar with some of the kids and surroundings. He has LOVED it and it makes me excited for preschool for him. He needs to be doing something CONSTANTLY so this will be good for him. He hasn't been too thrilled about dressing up as certain things (he's just like his momma), but it has been such a blessing for him to memorize his verses and want to bring in offering. :)
5. I now have 48 items listed on Etsy! I can't wait to break 50 and I have them ready to go but haven't gotten the go ahead from the designers I test for. By the way- I love the testing world! It's the kind of thing that I can do as little or as much as I want. Any design I test I receive for free with the promise of sending a good quality photo. It's a win win! I am gearing up for fall and even *gasp* CHRISTMAS! I have 2 Christmas kitchen towels listed in my shop! Always thinking a season ahead!

The Sandbox Turtle

What says childhood better than a turtle sandbox?! It's like the second I had kids I needed one of these.
I kept my eyes out for a while on second hand yard sale sites. I took a break last summer since I knew we were moving and it would be a pain to store- but once we were settled I resumed the search. I actually posted in the "want to buy" section that I was looking for one and someone contacted me with exactly what we needed! The little green turtle!
It was in perfect condition and just needed a little dusting off.

What I didn't expect was the search for sand to be such a pain. Have you read about play sand recently?
Apparently there is a warning on the bags of play sand that the airborne dust particles can carry carcinogens which can cause lung cancer... ummm last I checked I try to avoid carcinogens and lung cancer. And protect my kids from them. and for that to be in PLAY SAND? Intended for use in children's play areas?! That's terrifying. Of course I can't protect them from everything. But from the things I can protect them from- I will.

So my idea shifted to plan B. There HAS to be safe sand right? Not all sand contains calcium sulfate. A quick search on amazon brought up this sand:
It claims to be free of silica and all the other "bad stuff" that's in typical play sand. But At $30 for 25lbs I read somewhere that I'd need about 3 bags to fill the turtle. And after having saved so much on the turtle I didn't want to blow it on $90 worth of sand.

Another sand alternative is to buy river sand which comes literally from the ground. It's typically quartz I believe and although it can still create dust, it's not as bad as the manufactured stuff. But we don't have a truck and I couldn't imagine getting a delivery to our deck- that 2 stories high. So sand was officially scratched from our list.

We also questioned whether sand would be good since our AC until is below our deck and also our driveway. We worried that a lot of sand would be lost by being thrown down.

There's good news! There are some alternatives to sand. A few I found are:
1. pebbles. Kids can still fill cups and dump trucks with them. Again being over the AC until and living VERY close to neighbors (and drive by cars) we just didn't think pebbles were a great idea.
2. rice. Another good idea. But I saw that getting costly too. Plus isn't that bad for birds? Plus if it gets wet I worried about it rotting.
3. corn. Again I worried about rotting.

And those were pretty much the alternatives I found. Womp. So as I was sitting enjoying our patio furniture I tried thinking of ideas. Heck, my kids enjoyed playing in it empty! I also thought to maybe just fill it with water and let them go for it.

It suddenly hit me- what about a ball pit? Remember those? And ewwwww the ones at Mc. Donalds where kids probably used the bathroom in- remember the smell? #itdidntgrossmeoutthen

But balls were out because, again, I could see my kids finding great joy in throwing them at neighbors passing by. So I decided to grab some pool noodles.
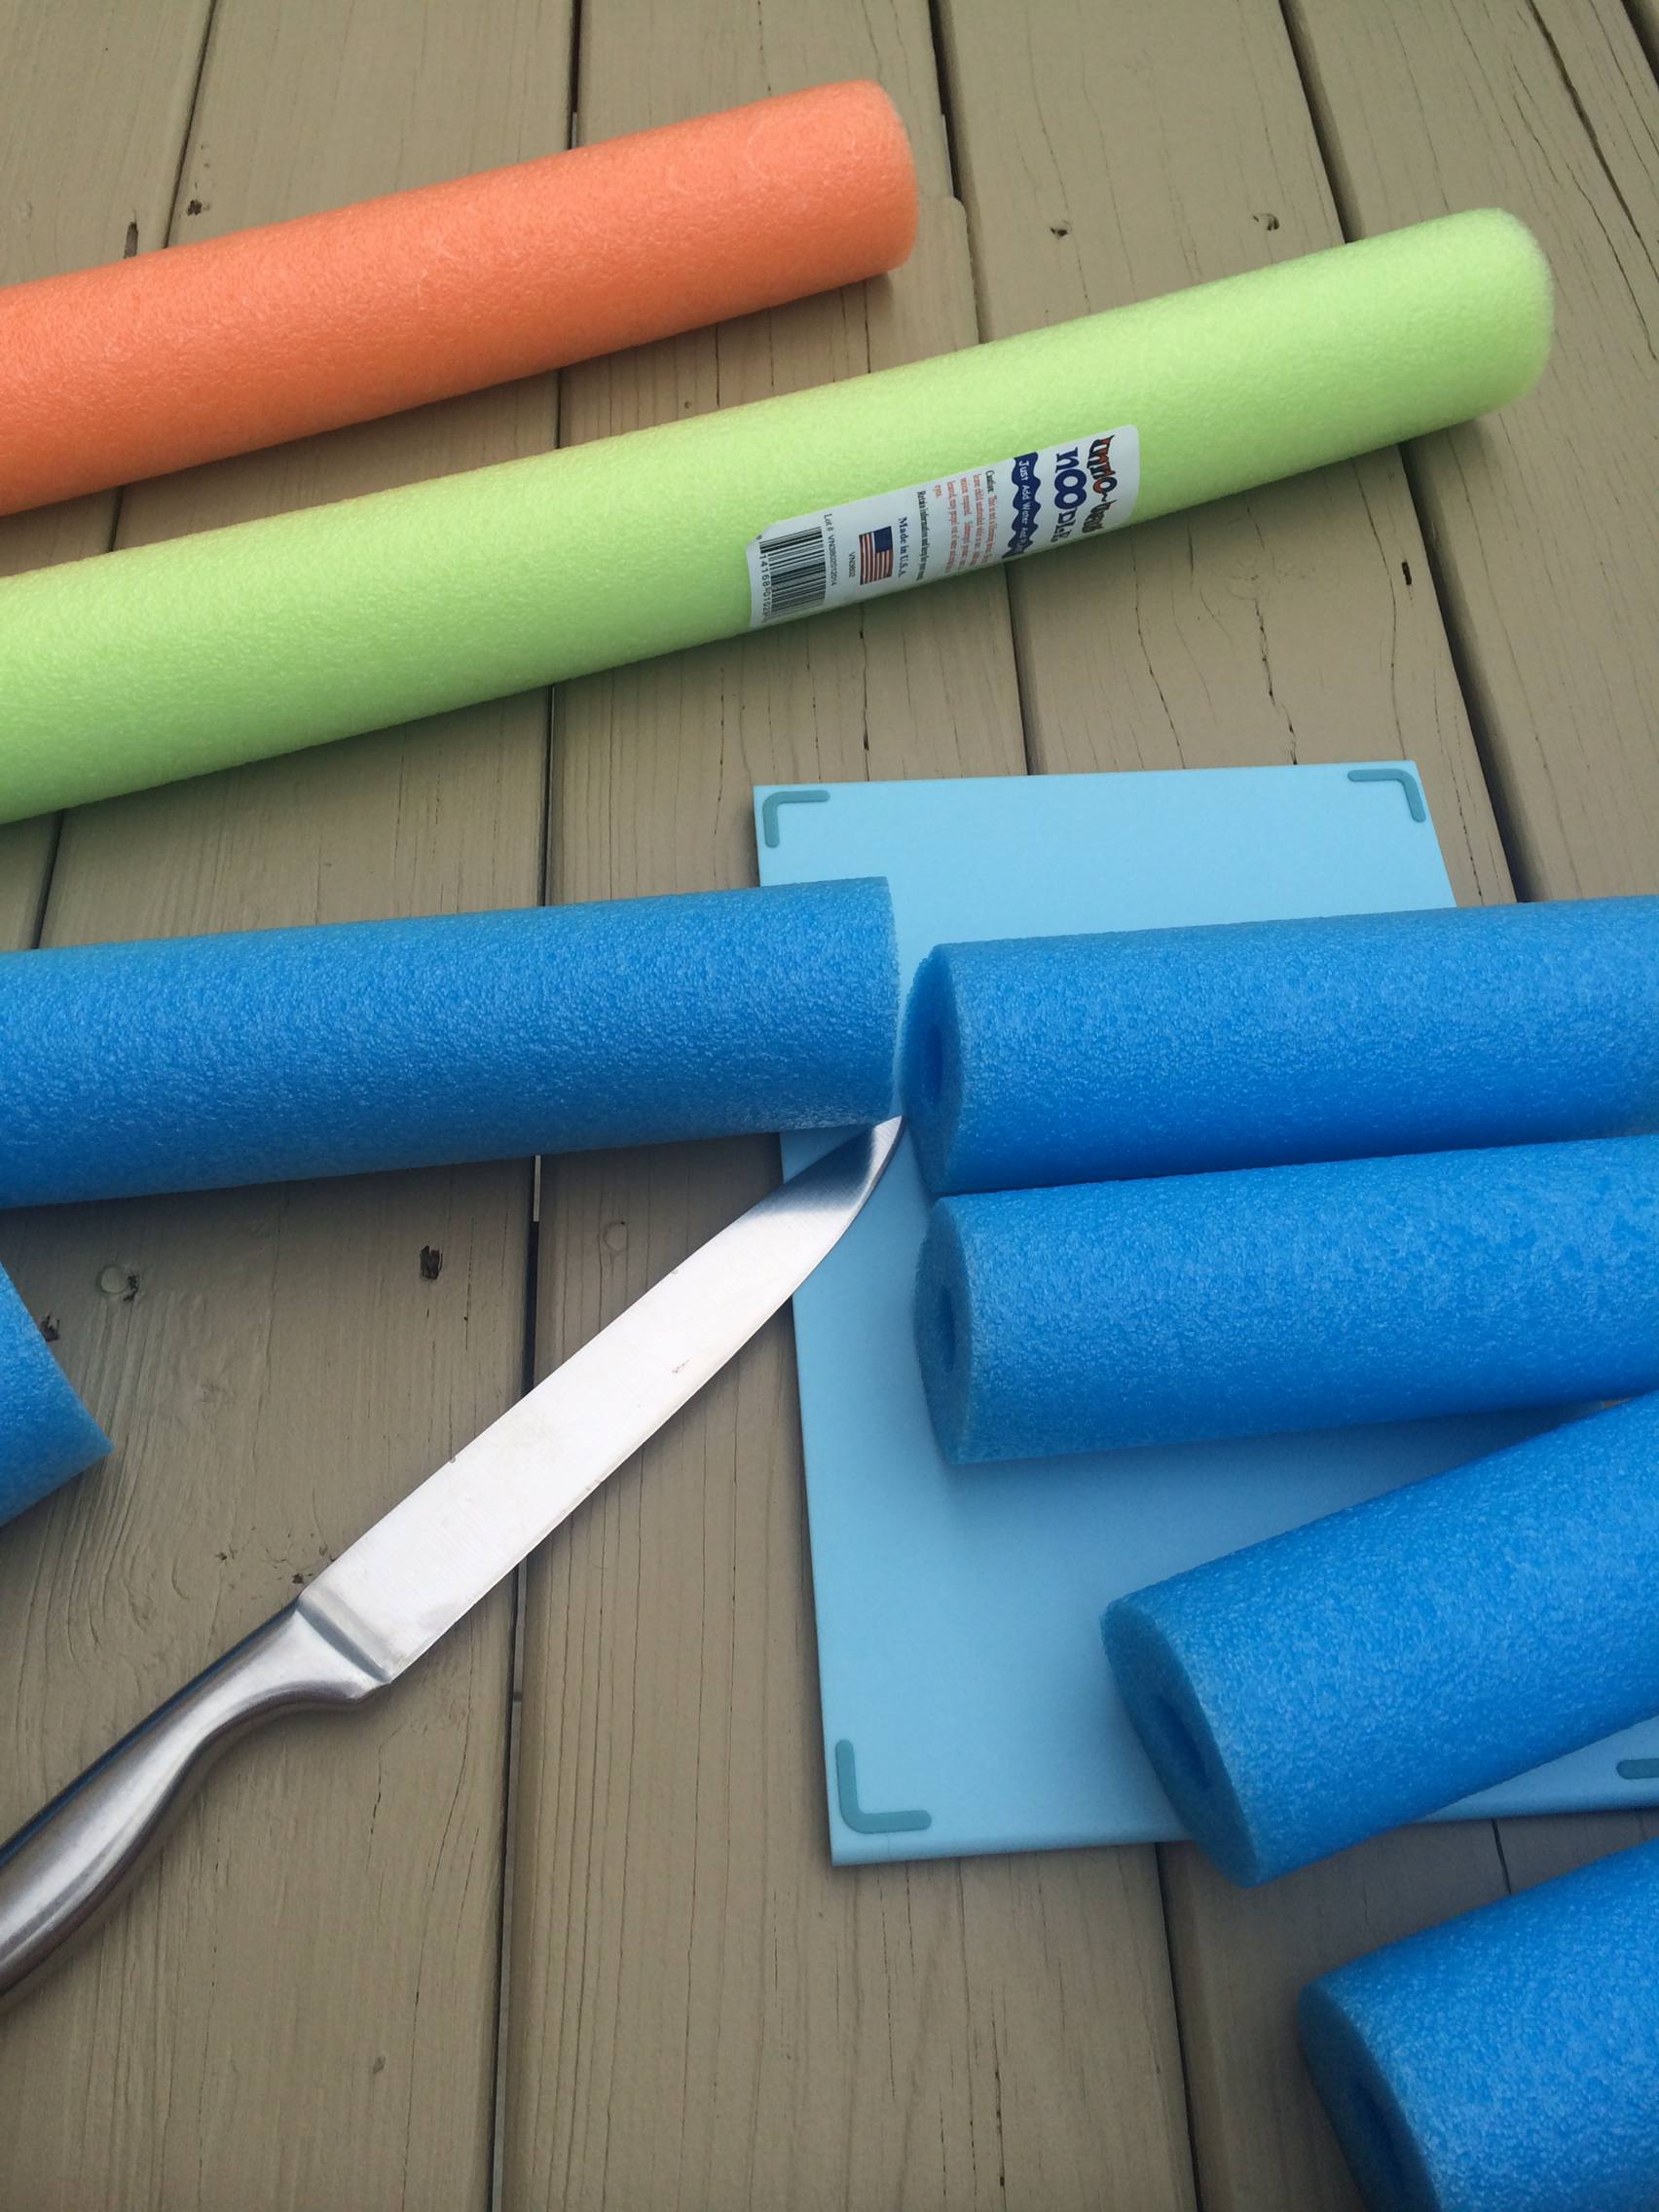
I thought they would probably be fun to stack, and hide under. And at $1 a pop they were super inexpensive. I started with 4 and that clearly wasn't enough.
So why that size? I'm so glad you asked. Although they can fall off the deck because they aren't wide enough- I wanted to make them tall enough to not fall down. If it doesn't seem to be an issue I may cut them even smaller. But I wanted to see how this went first. So far the kids LOVE it.

By the way they are super easy to cut. Luke snuck out of bed one night and watched me and I heard him crying inside. When I asked what was wrong he said he was sad that I was cutting up his pool noodles. I assured him that I had bought more and his were still down in the garage. I guess the punishment for being out of bed was watching his beloved noodles die a slow painful death by stabbing and slicing.
I ended up buying 4 more to fill the pool out. So $8 total was the cost (after the $15 for the turtle). Not a shabby "sandbox" for under $25!
We did make sure that the sandbox is against the house, not the railings. Wouldn't want to tempt my little people too much. Plus since they're not round if one does get loose it's not going to roll down the street into the sewer or anything crazy. I'm sure Luke will feel like a big helper going to retrieve them!
I feel like my life is complete now that this sandbox has a purpose!


The Deck: Paint and Progress

Having some sort of deck was on our shortlist when we purchased our home. We enjoyed our last deck so much (and then tore it apart and had it rebuilt) and tend to spend a lot of time outdoors with the kiddos when we have somewhere to sit.

Almost every house we looked at had a deck. And some were in pretty pitiful shape. I guess it's just destined to happen when wood is left exposed to the elements. But decks are expensive!

When we first laid eyes on our house we weren't sure how a deck would work since the garage was around back. But when we walked through and realized that the house was actually 3 stories- it totally made sense.

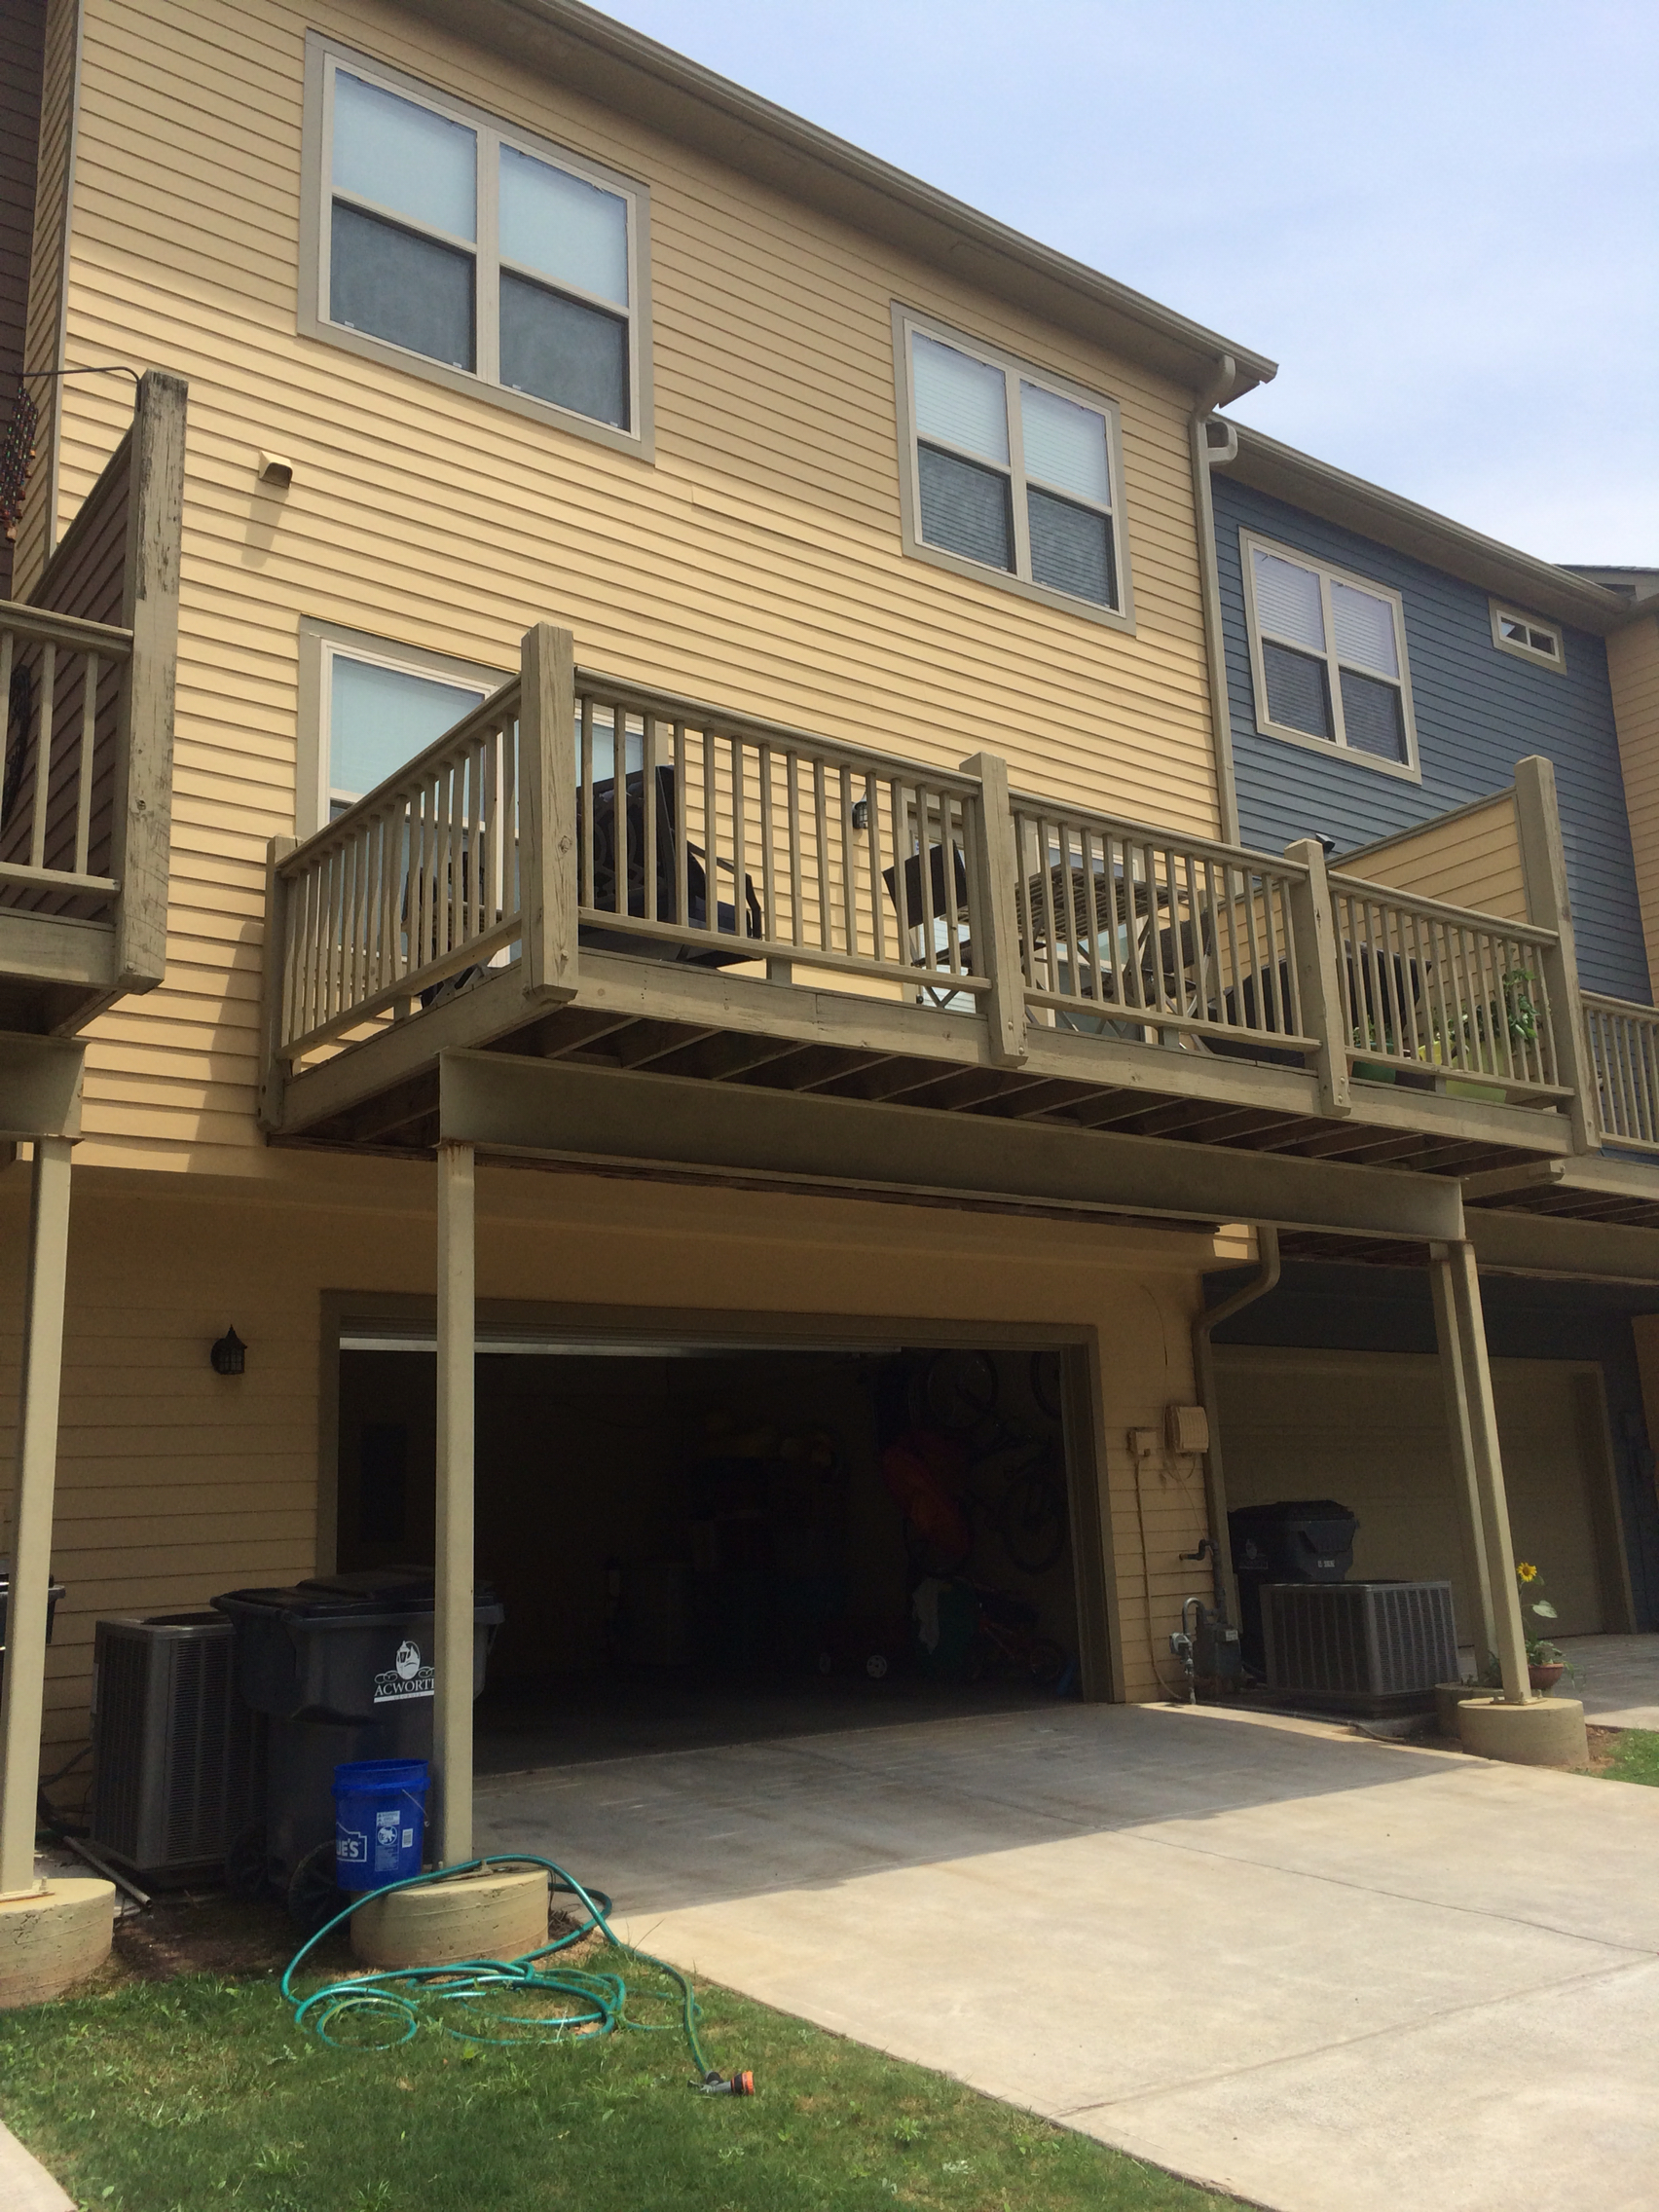
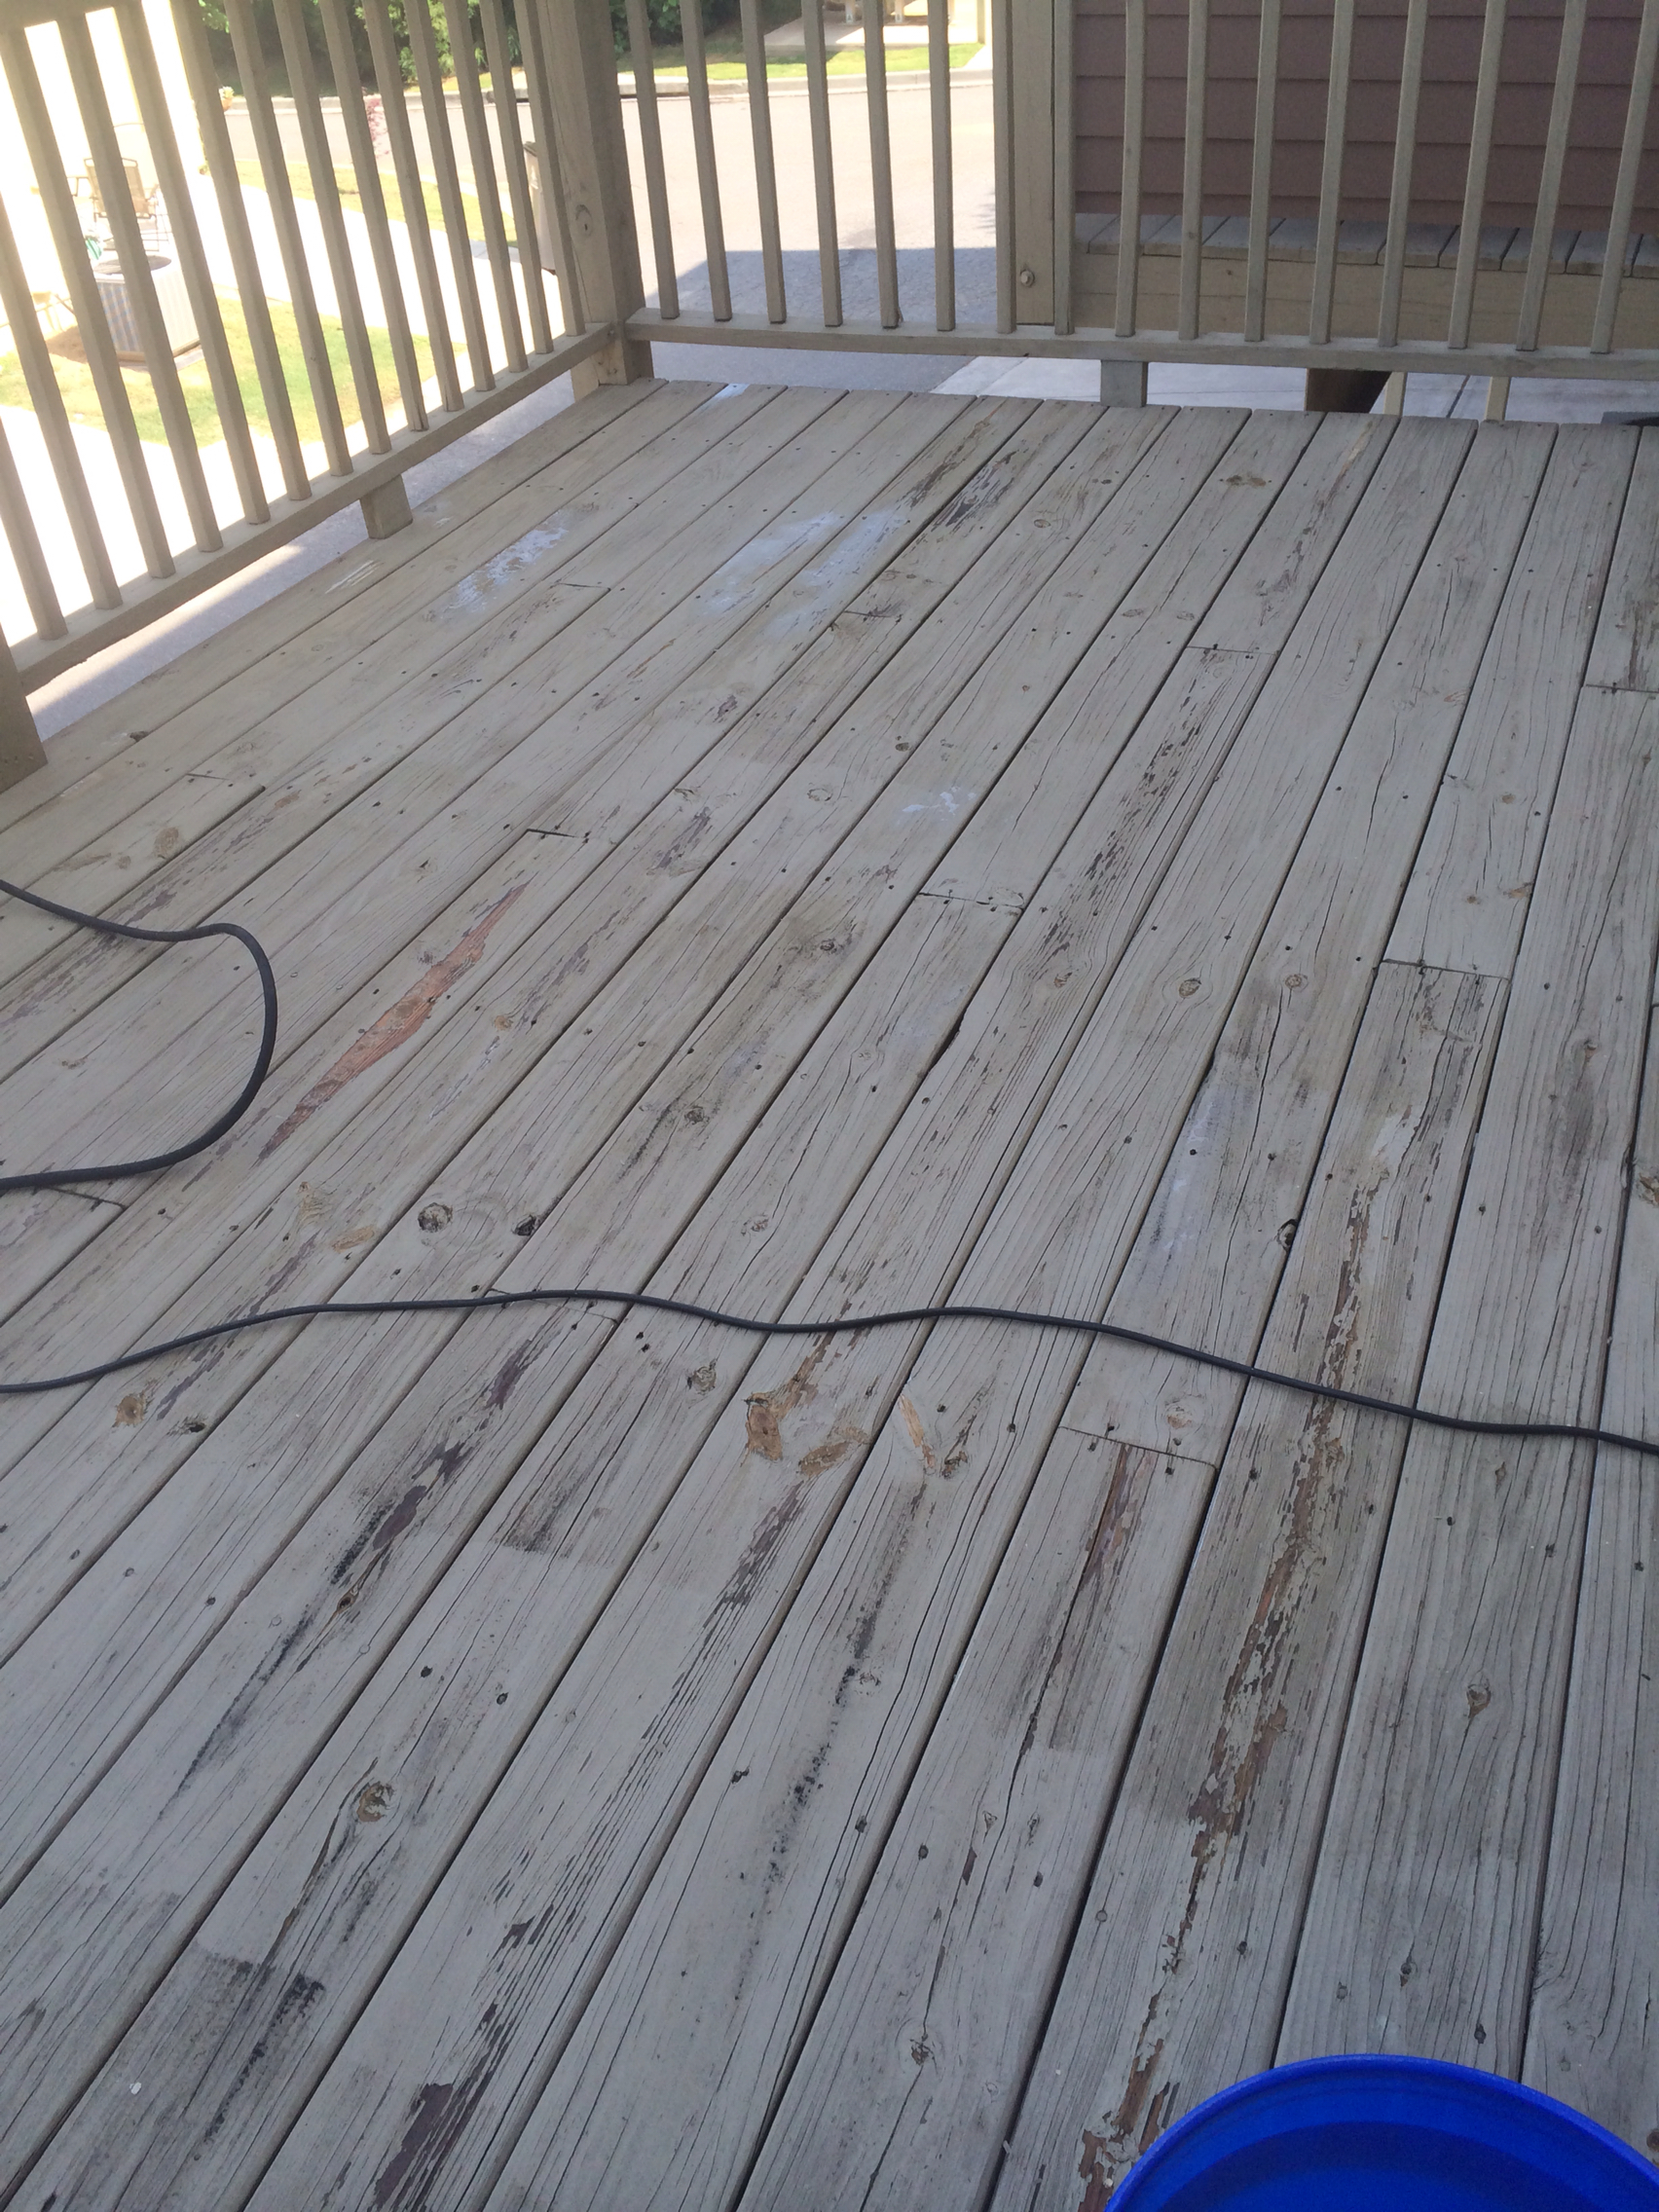
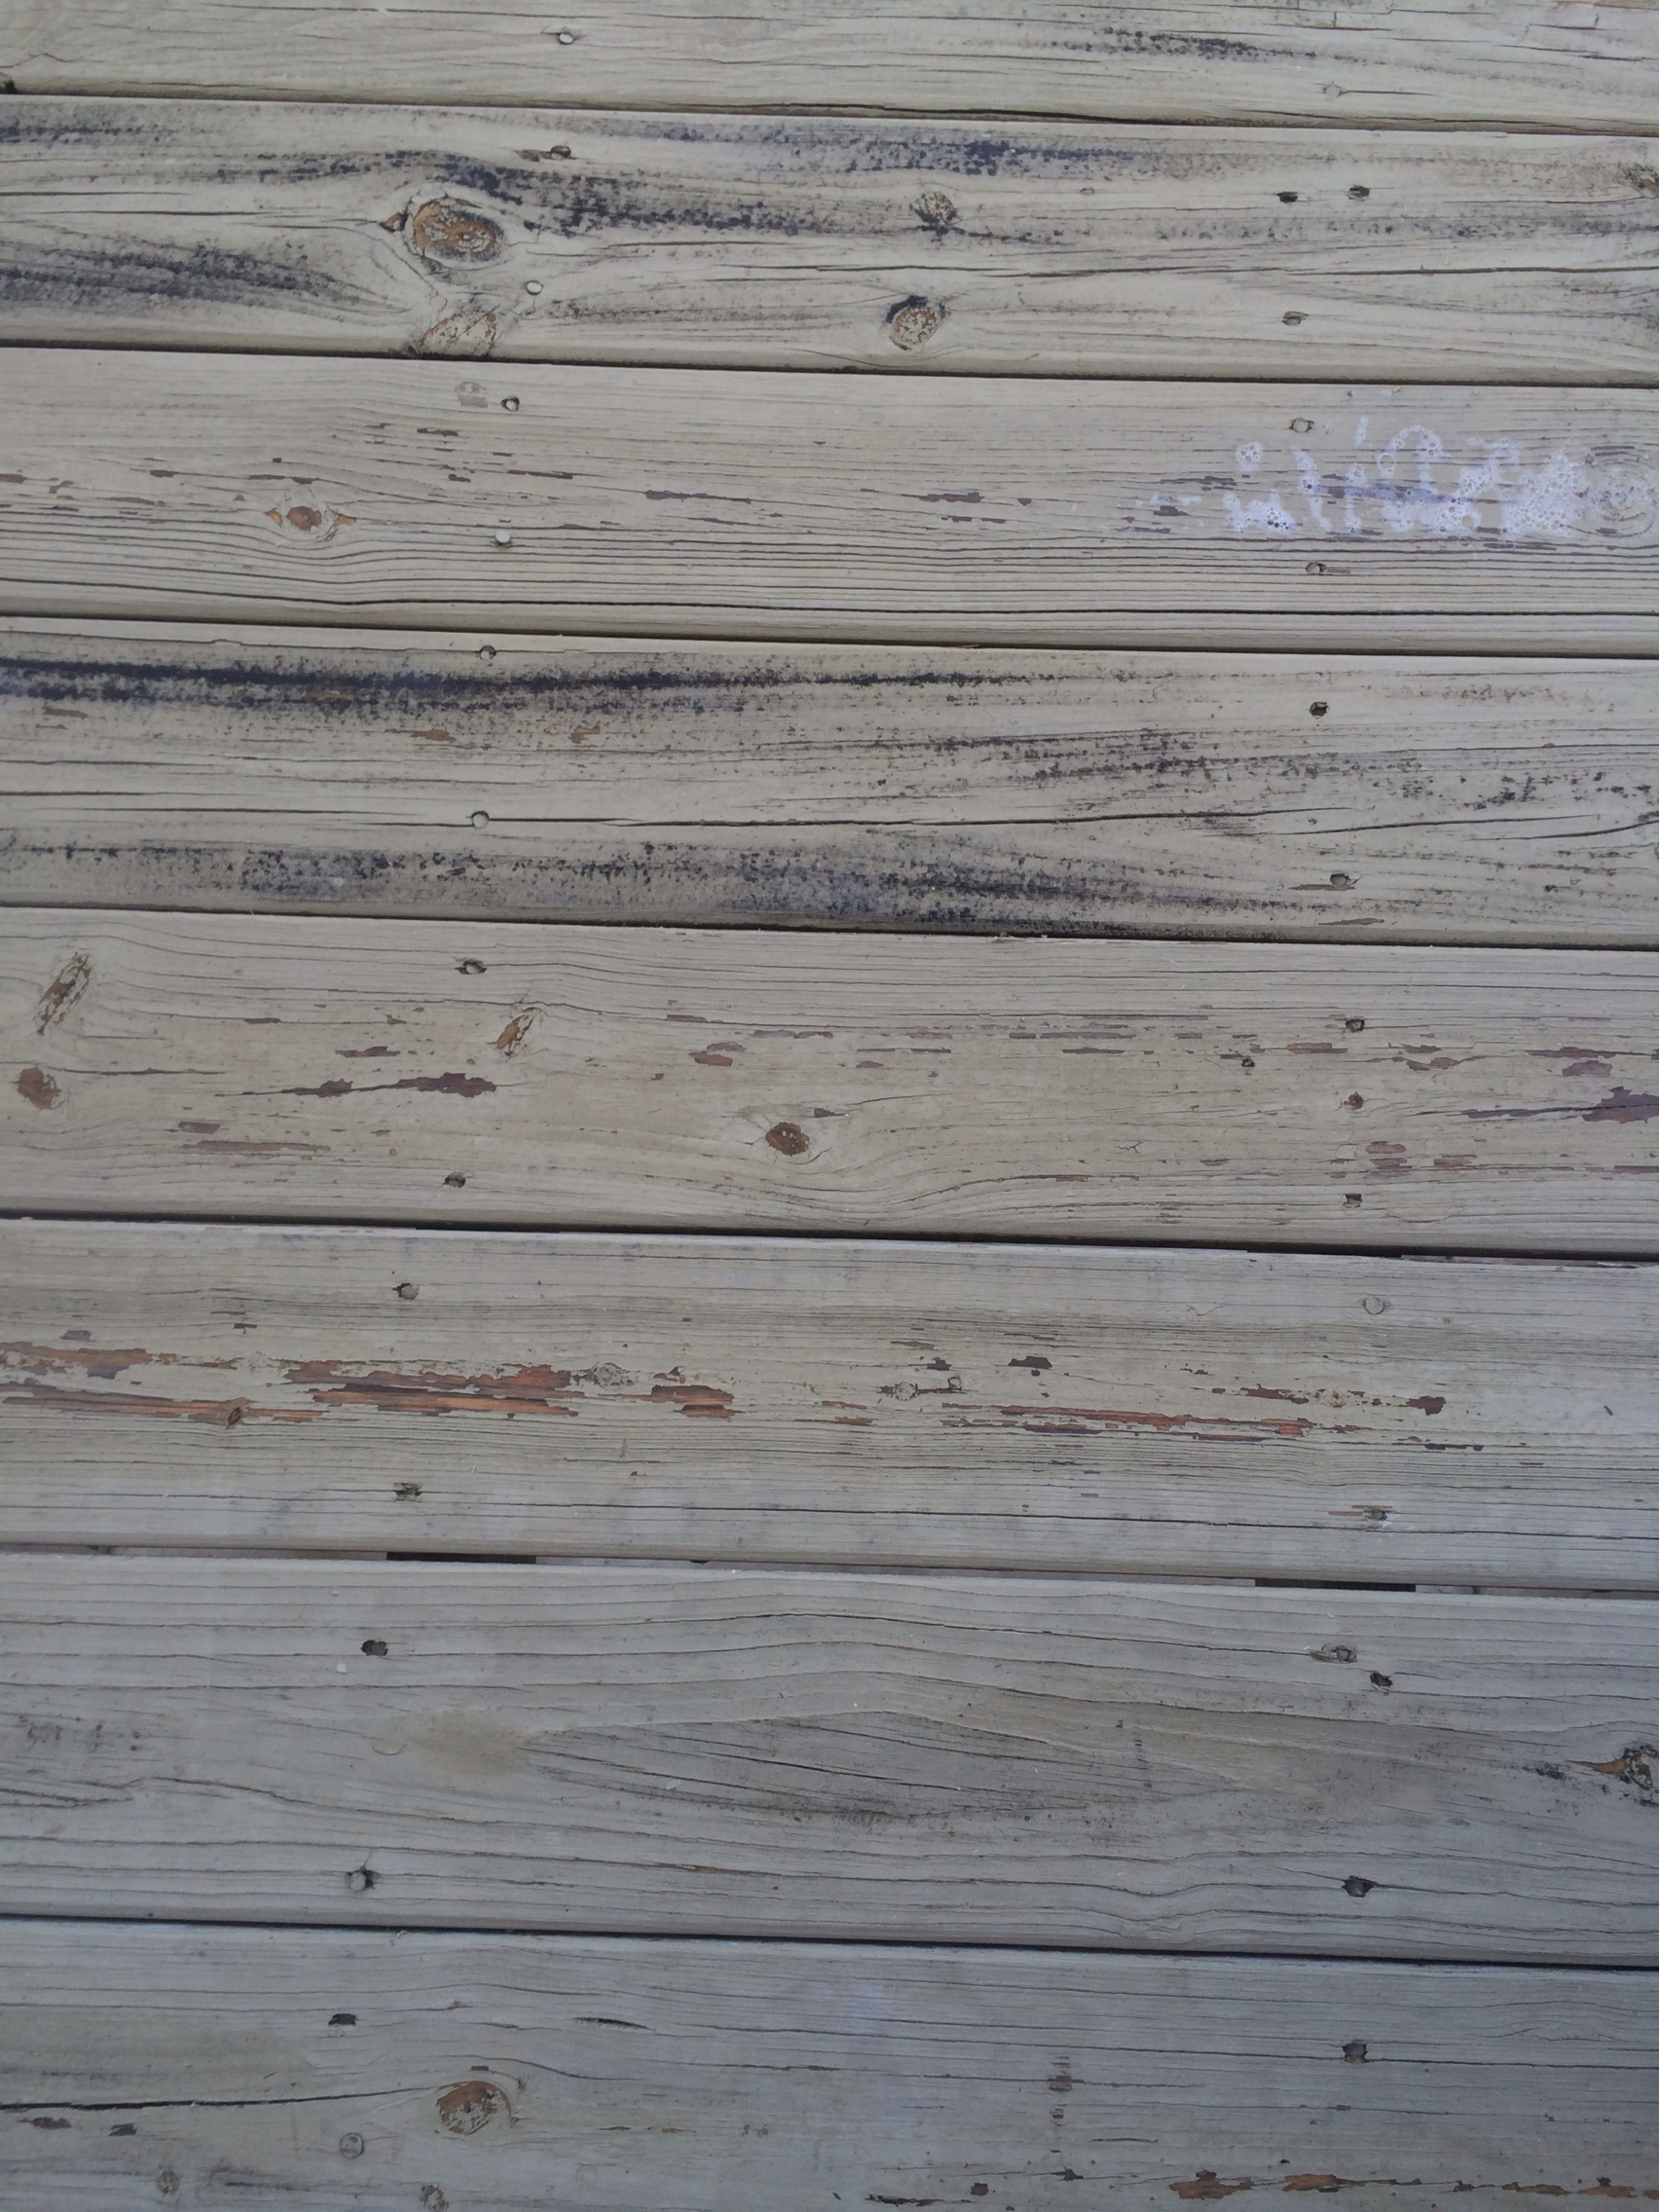
One of the first things we noticed was that the deck was in pretty rough shape. This house is approximately 7 years old, and I think that's the last time the deck was painted. Thankfully since it's a story off the ground it's supported by metal beams that are secured in concrete.

Since this is a townhouse with an HOA we were told at closing that they were actually going to refinish the deck for us- wow really?! 

Well we closed in the middle of December and January 1st we received a memo from the HOA that all doors, windows, and decks were being turned over to the homeowners. Just our luck right? They still take care of anything siding and roof related. But it was kind of a bummer realizing that we'd have to take care of it. But it's not really THAT big and a generous neighbor passed down his paint when he finished his- so we got 1/2 a can of paint out of it. We did have to purchase more since 1 gallon wasn't enough- but I didn't even know how to match the paint color- so the hand me down paint was actually a blessing. 

It seems like we're always working outside in the middle of the summer. I guess it's how we roll- speaking of rolling this was a pretty straightforward process. We pressure washed first (and used some dawn for extra cleaning), waited for it to dry, then sanded, and finally painted (with a brush and roller). 


Some of the boards had wide cracks so we wanted to really push the paint into the cracks. Then a roller made everything smooth. Not sure why I keep saying WE. I didn't lift a finger painting. Figured I needed to say that in case hubs is reading.

Disclaimer? We didn't do the rails and posts. This weather has been CRAY this year! I mean suddenly we live in the tropics and get a rain storm every afternoon. So we had to work around that. Oh and Josh's work schedule. And life with 2 crazy babes. 

I do plan to go back and do the rails slowly. Someday.

Pressure washing took 1 day. Sanding took another. And then painting took 2 days. We didn't do 2 thin coats (like usual) but opted for one thick coat which took a little longer. 

All our deck stuff lived inside (including our grill in our living room) while the painting took place and we lived in chaos for a few days. As soon as it was dry everything went back out. Ironically the same weekend Target had 50% off all their patio furniture. I scouted everything out one day- took an unnatural number of pictures and made note of prices. I brought all my research home and we hashed out what we actually wanted/needed. 

We actually have a patio set at our old house but we left it for our tenants to use (and wrote it in the lease). We were planning to get it after a year, but realized mid December that we had no way to transport it and it wasn't really worth the trouble to bring it here. So we'll be leaving it. Once we figured this out we felt comfortable moving forward with the 50% off sale. 

We visualized a little seating area and then a smallish table with enough chairs for us. When I did my "research" trip I found the perfect loveseat that would fill the space. Josh and I typically try to consult each other on purchases more than $100 so I felt like we really needed to talk before I pulled the trigger. This was 6pm on a Friday night. 

We discussed everything and I made my list and got out early Saturday morning. Would you believe that someone else swiped the ONLY loveseat there? I was floored. I put on my game face and kept going. I ended up finding a seating situation that fit the bill. It was a little more than the original plan, but in the end I think I really like the 2 separate chairs. I think the loveseat would have felt... awkward especially if you're sitting next to someone who isn't your husband. 

I loaded up 2 carts, and with the help of a nice associate got it all paid for and loaded. 

Our deck today looks a little something like this-

This is the far corner to the right of the door.
The side of our house is yellow and our grill is red- so I wanted a nice neutral compromise. I would love to find some throw pillows that incorporate the yellow, red, navy and possibly aqua blue to tie it all together.
Because this side of the house gets direct western sun, it's gorgeous out here in the morning and for lunch- but by dinner it's pretty hot. We'll eventually get an umbrella. Just want to find a large one that's pretty sturdy and has good reviews. Now THAT'S hard to come by!
This kind of gives you a better idea of how small this space actually is. The table does have 4 chairs that will live out here, but while we wait for the rest of our indoor handmade farmhouse bench to be made they are filling a need inside. 
And I have another post in the hopper about what's inside Mr. Turtle. It's a mess free, practically germ free, and cheap alternative to a sand box. 

On the other side of the deck is the grill and my green bean garden. Seriously don't be hatin'. We lived in a house with half and acre and  I never grew ANYTHING. We now live in a town house without a yard and I'm obsessed with gardening. Go figure. And it's practically the only thing that I can keep alive (besides my kids of course). 

We love sitting out here and sipping coffee in the morning. 
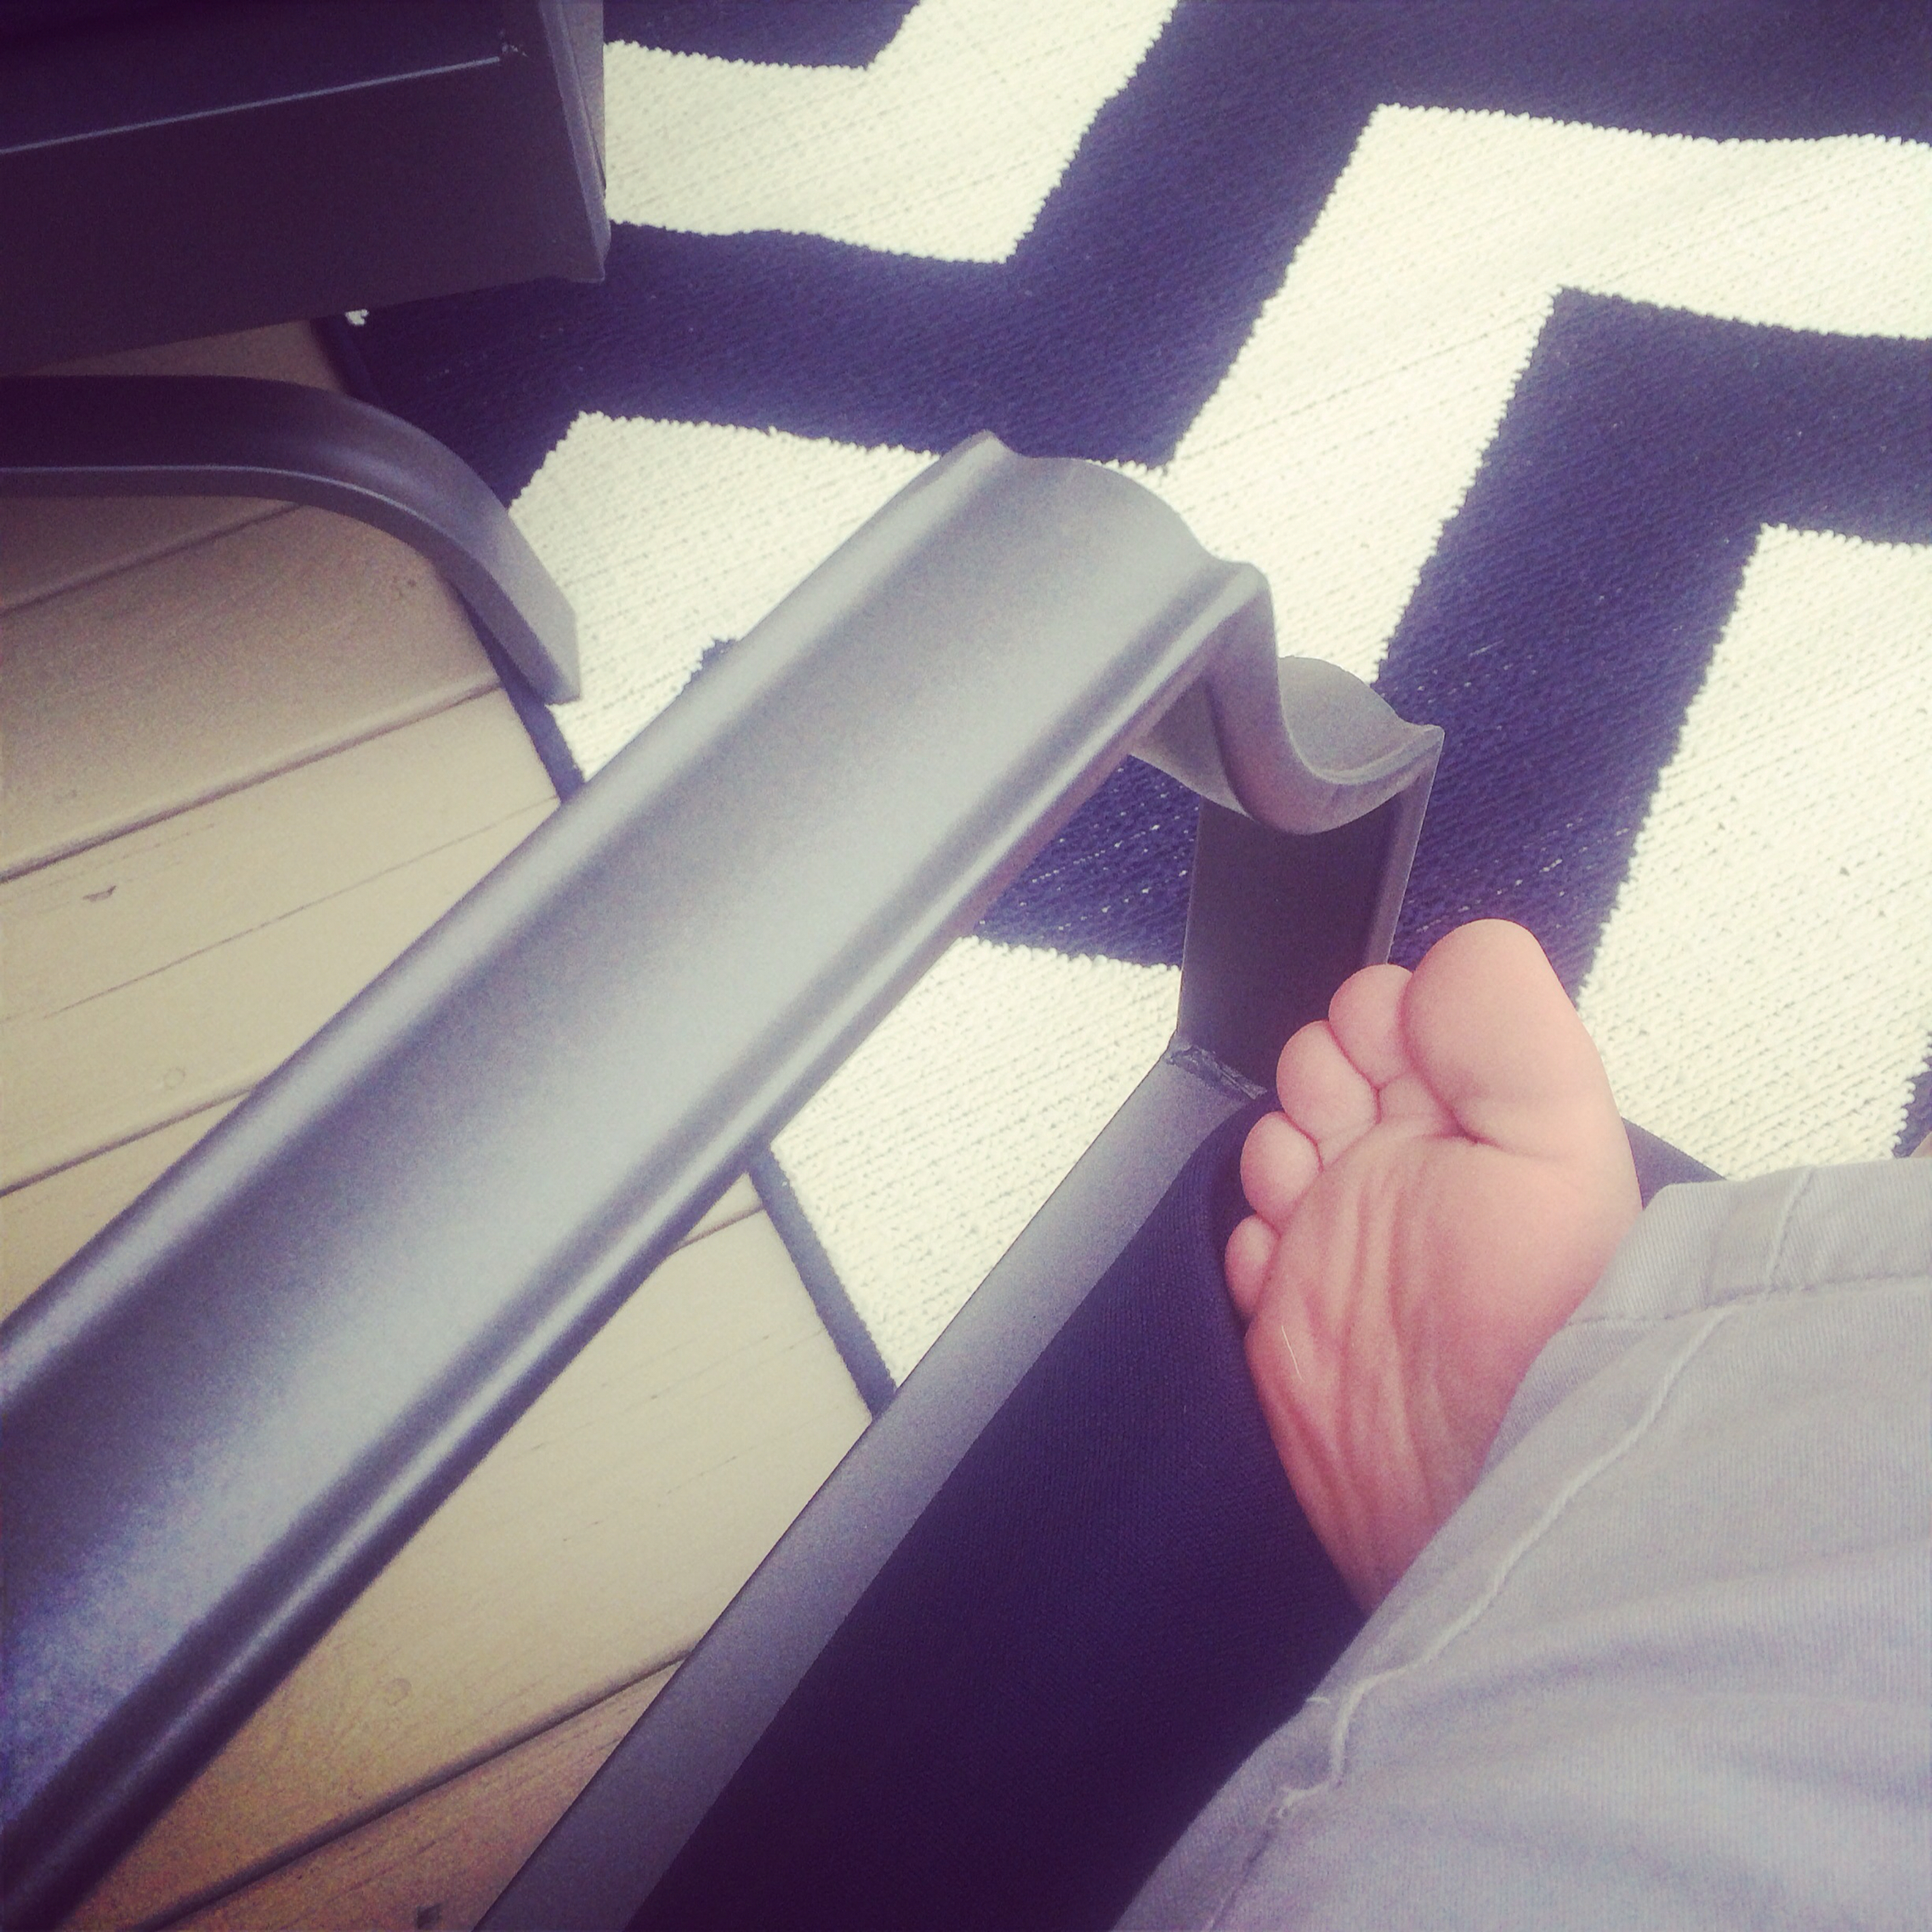
By the way- am I the only one or do you ever feel like waiting for a sale is like gambling? I was SOLD on an outdoor rug. But it was the only thing in the patio section that wasn't on sale. So I bought it. But I questioned myself over and over "will it go on sale?" "what if it ends up being $15 instead of $30?" And I have this debate in my head in the store. I usually try to think what I would feel if I let it go and would I be disappointed trying to find another or is this one perfect? Ultimately I decided to buy it. I did leave the tags on for a week just in case, but I checked back a few days ago and 3 weeks later and it's still full price. And there was only 1 left. So I say it was well worth the purchase!