You know I like sharing a little bit of everything on my blog. From
painting projects, to
couponing, to being stranded in
Atlanta's Snowpocalypse, to our
children's birth stories. I like to mix it up. Really the whole reason I started this blog years ago was because of my side monogramming/embroidering "business". I don't really like to say business because that implies work and it is truly what I LOVE so it's not work to me.
I know this post really won't apply to many of my readers because most don't have embroidery machines. But most people have NO IDEA what goes into machine embroidery. And rightfully so my prices have to reflect the work behind the shirt (or bib/burp cloth).
So allow me to share my top ten tips that I've learned in the last four years of doing this! I started with a
Brother SE-400 embroidery/sewing machine. That little lady lasted over 3.5 years! She still is a great sewing machine, but I have upgraded to a
Brother PE700ii. It's the twin sister to the 770 (which is what's linked- with a slight difference in connection capabilities).
Every good shirt has been made with excellent stabilizer. Stabilizer is the "stiff stuff" behind the design on the inside of a shirt or the back of a bib/burp cloth. I have found my perfect formula:
I hoop Sulky Sticky+, float a piece of medium cutaway stabilizer, ironed on "fuse and tear" tear away stabilizer inside the shirt, and put Sulky Solvy on top of the design. I've actually changed my method! Check out
this post for more details! While I now prefer to hoop (see that post <--), I spent a long time hooping sulky sticky and floating cutaway on top (I broke a hoop once hooping and was scared of hooping for a while) and then pinning the shirt to the stabilizer (then going over it with a basting stitch- which I'll mention later). Also remember the rule: If you wear it DON'T tear it!
1. I use sulky sticky when I'm doing bibs and burp cloths. Also it comes in handy when you need something to stay stuck (that won't fit in a regular hoop). If I need more stabilization I do sometimes float polymesh over the sticky.
2. I prefer the pre-cut squares. I have both sizes (that fit the 4x4 hoop and 5x7 hoop). HUGE timesaver. I use cutaway on most items (t-shirts, gowns, bodysuits, etc.). Pretty much anything knit.
3. Tear away. I like the fusible kind (since sulky sticky is a tear away as well).
5. Sulky solvy- I use this as a topper AFTER all my tack down stitches and BEFORE the final stitch. There are people who swear against this stuff and that it doesn't make a difference, but in my experience I've done side by side tests and on knit, this stuff makes my stitches crisper and nicer looking!

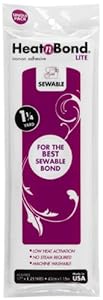
Oh how I love this stuff! It's so important it got it's own space. If you are stitching an applique you have to use small pieces to fabric to put the design together. The fabric typically needs to coordinate together and go with the design. Gingham, polka dots, stripes, and chevron are EXCELLENT choices to stack on top of solid colors. But all these fabrics tend to pucker and pull up off the shirt if they aren't fused properly. Insert HnB lite! I iron on HnB to the back of every piece of fabric that goes into my appliques. I wait until the entire shirt is done and then fuse it all together (with a pressing cloth between the iron and shirt of course!). The iron can melt the polyester thread if you're not careful so some people iron as they go. I don't have an iron small enough to fit in a 4x4 hoop. But HnB is the way to go and ensure the designs stay put for as long as the shirt is worn. Also I always recommend flipping the shirt inside out to wash.

Quality thread. When I started embroidering, I had no idea there was a difference in thread. I started out buying whatever I could find at Wal-mart since that was the only place I could buy thread (we've moved since then). Coats and Clark thread is fine for sewing, but not for embroidering. I had so many issues with thread shredding, breaking, and just not stitching properly that I turned to the internet for answers. Sulky, Isacord, and Marathon are the thread brands that come to mind that are recommended most. Of course there are others but these are ones I've heard recommended. I personally LOVE Isacord. As weird as it sounds, your machine really does have a preference to thread and you have to find what works for you. Also you SO get what you pay for. Isacord is more expensive than Coats and Clark but saving my sanity is worth every penny! Read more about my love for Isacord thread
here.
Again I had no idea there was a difference. Typically with needles the needle makes the hole and the thread follows. Simple right? So using a needle that's too large for the thread can cause holes. Also there are two types of needles to use when embroidering and monogrammig: regular sharp needles and ball point needles. I've been using ball point needles for knit (shirts and onesies) and it seems to really help. How it was explained to me that instead of tearing through the shirt to sew, the ball point eases it's way through the knit fibers of the shirt= less holes. My go-to needles are Schmetz's embroidery needles- 75/11 and Ball Point needles (
Organ brand) also size 75/11. I typically sew (not embroider) with with 80/11 needles but if I have a 75/11 in the machine from embroidering I usually will leave it just to save a few minutes.
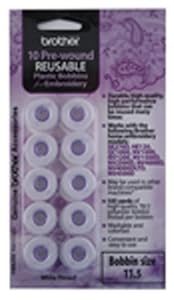
Game.changer. This is a recent switch for me, but after tearing my hair out last summer because my bobbin thread would show through on top, I figured it was worth at least trying them. Y'all it got so bad I started winding my bobbins with the same color I was using on top. Talk about time. From what I understand prewound bobbins are more accurate as far as correct tension goes. I tried to wind my own bobbins with specific bobbin thread, but even that didn't work. I spent a war pension on them (they're about $2 each for 100 yards), but to save me the stress- totally worth it.
Also to prove how well they work here's a peek at the back of a shirt. The back of a design should look like an oreo 1/3 top thread color, 1/3 bobbin color, 1/3 top thread color. This was NEVER the case on the backs of my designs before I tried these bobbins.
**Since writing this post I have actually fallen in love with prewound bobbins from MJ sewing supply. When I wrote this post I used a machine that needed 60wt. bobbins. Now my machine uses 90wt so I had to switch suppliers.
Here are the ones I order.
There are different types of designers and digitizers out there: appliques, fonts, and filled designs. From being "in the business" I've learned who to trust and who not to. The quality of the design is half the battle. Some of my favorite places to get appliques and fonts are from:
Applique Cafe,
Applique Momma,
Planet Applique,
Applique Market,
Applique Frenzy,
Pick & Stitch,
Lynnie Pinnie,
Appliqué Momma,
Designs by Juju, Hooked on Applique,
Hang to Dry, Munchkyms,
All Things Applique,
Belliboos,
The Itch 2 Stitch, and
Embroidery Boutique. I have tried others and haven't been thrilled. I'm sure there are tons of other great applique sites I haven't tried. I've also bought some on Etsy, but I find it's safer to stick with actual websites. You have no idea if the people on Etsy actually digitize properly. I've lucked out with Etsy purchases, but it makes me nervous every time I order. I've also had crazy good luck with
Jolson's,
Rivermill, and
Blastostitch. There are some people who HATE these font sites... but the short story? Trust your designers and go with ones that people have tried and go back to them. If I ever have an issue with a design I go straight to the designer and my issues have always been resolved. Also ALL applique designers run sales. The typical price for a applique is $4 but many run sales frequently. I try to never pay full price unless I'm in a bind. Appliques and fonts can be used again and again without paying a second time. I probably don't have to say it but I'm going to anyways- don't file share. It just isn't fair to the designer.

Learn how to do it and USE IT! This again is something new I've learned. I purchased a program called Sew What Pro (SWP). The program allows you to merge designs so if you want to add a name to an appliqué you do it in SWP. Also you have to have a merging program to merge letters to create names from purchased fonts. Once you have your entire design ready to go you click tools>basting stitch and it adds a box around your whole design. This does three things...
1. It holds you shirt and stabilizer in place which prevents shifting. I've had plenty of shirts shift while they're stitching out and it's ANNOYING not to mention it ruins the shirt.
2. It lets you see if you've placed your shirt on straight. The basting stitch always becomes the first step so after it runs the stitch I pull my hoop off and check to make sure the box is straight. If the box is crooked, your design will be crooked.
3. It helps with puckering. Certain fabrics are prone to puckers and the basting stitch helps.
The basting stitch run large stitches around the design area. The basting stitches are removed with a seam ripper after you are finished. They are so big that you don't even notice the holes (and after washing they're officially gone). By the way SWP is available through
Sans Computing and they offer a 30 day trial. I can't believe I had the program for 3.5 years and never knew that option existed!
Become part of a support group through Facebook! I'm a member of the SWP group and the Brother embroidery machine group. I have learned more in a MONTH from being on the brother group than I ever did on my own. I pretty much taught myself to use SWP, so nothing is really new to me there, but I enjoy keeping my skills up and reading what other people have to say.
Purchasing good quality blanks is necessary. Gerber onesies just don't cut it. If you want your design to hold it has to have a good start. My go to for onesie blanks has been Carters (they're super soft) but I've recently come across
Blanks Boutique (BB) and you just can't beat the quality of cotton. Also
ARB Blanks,
Chevron Boutique Blanks,
DBA blanks, and
Absolute Blanks offer high quality affordable blanks!
Find a place to have your machine serviced. I use
Sewingmachine.com which is located in downtown Atlanta. You have to trust the people who service your machine. In 4 years, my machine has only been in once. And they have excellent customer service if you are in the area. I emailed to inquire about service and they immediately emailed me back with details. Love them.
And for a sampling of work:
Facebook: Create Pretty Etsy: Create Pretty Email: createprettyemailatgmaildotcom
**Any link may be an affiliate link. See my disclosure policy
here.


I found the link to this post on pinterest and your info is very helpful! I've been sewing over 40 years but only got a Bernina with embroidery this year. I took my class and started with embroidery 2 weeks ago, so I'm a complete novice! All of your advice is much appreciated!
ReplyDeleteThank you for stopping by Janie! You will learn and be totally sucked in! It's a blast (and can be totally frustrating all at the same time)! Good luck!
ReplyDeleteCaroline
Hello! I love your patterns, I did a test run of this Rarity (to put on a fleece hat) but I ran into some trouble. It seemed as if the pattern shifted (the body outline) and the mane/tail had issues. I think it was something that was wrong with my fabric/stabilizer. Do you have any tips for embroidering on fleece?
ReplyDeleteHi Emma! I am not a digitizer, so they may have other advice, but I have found that with "slippery" or thick fabric like fleece that it's best to use a basting stitch. I use SWP (sew what pro) so I add the basting stitch around my pattern. Not only does the basting stitch hold your stabilizer and fabric together, it helps you make sure the design will be centered. Also make sure that you are using a good stabilizer. A good rule is "if you wear it, don't tear it"- so anything you wear or put on (especially with knit) should be cutaway. I only use tear away on towels, bibs, and burp cloths. Sometimes I have to use 2 layers if the design is really dense. Check the stitch count in your program too. It its more than 14k stitches or so I like to double up on the stabilizer (or at least add the tear away to my cutaway regimen). Hope that makes sense! :)
DeleteI like what you said about basting stitch helping with puckering. I'm new to embroidery, and the last thing I made started puckering. I will try and learn how to do the basting stitch to avoid this problem in the future.
ReplyDeleteAbsolutely! Also if you are still getting puckering try upping your stabilizer to something more stiff. If you are using tear away, switch to cut away. If cut away try adding a tear away or double up on the cutaway :)
DeleteWould you please give me the exact Brother group you are a member of on facebook? There are several and I want to join the same one you're in. I got an SE400 for Christmas and am hooked!!
ReplyDeleteSure! I'm in the Brother PE embroidery group. There may even be an se400 page now. But the brother PE embroidery is pretty generic for brother machines :) and congrats on your new machine! Here's a direct link to the group: https://m.facebook.com/profile.php?id=388276124532366&tsid=0.38082470931112766&source=typeahead you'll have to be accepted I believe.
DeleteI love this article! I've had my machine for about a year and a half now and love it! I tried SWP but had a terrible experience with their customer service and ended up with different software. I DO love my machine and didn't know there was a Facebook group for Brother users. I'll be looking for that soon.
ReplyDeleteI'm very wary when I have to change my bobbin, especially in the middle of a project. I'll have to look into the pre-wound ones. I've also figured out that if I'm careful, I don't always need to hoop. Most of the time I can get away with floating my items if I'm really really careful.
Some great tips here and I'll be certain to pin this one as a great reference!
Amazing post, thanks for providing such a important information.USA nail salon
ReplyDelete