

NOTHING is the same as that picture on the right. 4 years later we have different couches, a rug, different coffee table, curtains, a piano, entertainment center/TV: WOW!
SO about the curtains...
I just didn't LOVE them.

Excuse the flag chair making it's home in my blue/brown/white living room. It's Luke's look out the window and wave bye bye chair. So it stays....
A few things I didn't like about them:
1. How the curtains laid flat. I love it when curtains look soft and flowy. These just didn't. They are the only privacy for our living room (where we spend most of our time), since we took off the mini blinds the day we moved in. We keep the curtains closed most of the time, which makes it difficult for natural light to come in. Also we don't want too much light because this window faces west and it can get very HOT and bright on summer afternoons.
2. How the curtain rod went through the top of the curtain. It was just blah.
3. How the curtains covered the only air vent in the room.
4. How the curtains dwarfed the window and also dwarfed the room.
5. The finials just weren't helping the situation.
6. The curtain rods (they were silver) got lost in the room. I wanted them more grounded.
6. The curtain rods (they were silver) got lost in the room. I wanted them more grounded.
Here are the finials before and after:
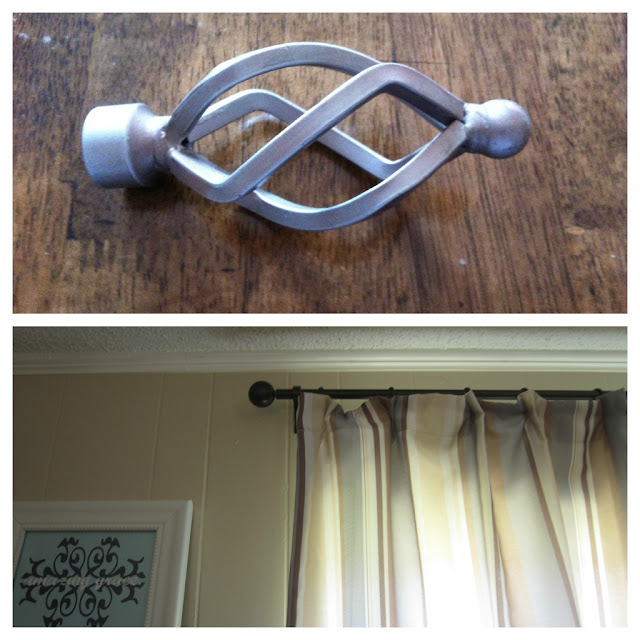
Here are the curtains before and after:


Here are the curtains before and after:

I added a white panel for softness and privacy while also letting the light in. The white panel is called Vivan from Ikea- at only $10 a pop for 2 panels I couldn't resist. A quick warning... WASH them before hemming them! I cut off ALOT of fabric and was going to hem them (with a 2 inch seam allowance), and after washing I hardly had 1/4 of an inch to work with. They shrunk up quite a bit, but after washing they were also 100x's softer!
The curtain rods got a new coat of Oil-Rubbed Bronze spray paint. The curtain rods are lifted about 6 inches. This makes the window feel bigger and the ceiling taller. It also uncovered the air vent to hopefully keep the room cool in the summer and warm in the winter. The old finials were replaced by round finials (found at IKEA) which match the other curtain rod on the opposite side of the room.
I used curtain clips to attach the curtains to the rod- which add visual interest to the top of the rod. So instead of the rod going through the back/top of the curtain, the rings go through the rod and are clipped on the back of the curtain. This was really the only solution for these curtains since the original curtains and Vivan panels had a different way to attach- it would have looked completely wonky at the top.
Total spent for this spruce up? Right at $30 (including the price of spray paint). The white panels were $10, the curtain clips we $1.99 for 10, and the ORB spray paint was around $7. The finials were $4.99 for a 2 pack. I bought 2 2- packs. Obviously we used the same curtains we already had= free!!

Here's a shot from the other angle of the room. This window was much smaller and it only had 1 original panel. I LOVE the larger colored panel and the smaller white panel because it's a little unexpected (and this picture makes the curtains looks shiny- they really don't look that way!):


And here's the whole room put together!

I LOVE the look of puddled curtains, and these don't exactly "puddle" but with a toddler, dog, and poorly placed AC vent this was the best we could accomplish with what we had!
I am trying to talk my husband into getting a new ceiling fan... I am not loving the lights hanging down, and we use table lamps in there instead. We have to keep a fan in there because our AC is super crazy acting in that room (we don't have enough intakes- therefore this room stays the warmest in the summer, and the coldest in the winter). I would love a sleeker fan with no lights in ORB. Pretty sure Home Depot has some for around $60- we'll see how my sweet talking goes!
No comments :
Post a Comment